
I stood there, staring at my 1974 Pioneer receiver, feeling like an absolute novice. It was a masterpiece of brushed aluminum and weighted knobs, yet I was listening to my favorite FLAC files through a pair of twenty-dollar plastic desktop speakers that rattled every time the bass kicked in. I had this incredible piece of audio history sitting three feet away, and for months, I let it gather dust because I was overcomplicating the connection. I tried some weird adapter chain that looked like a science experiment gone wrong, and the result? A hum so loud it nearly blew my eardrums.
Your PC and Your Vintage Amp Belong Together
The truth is, your computer is an incredible source of music, but it’s a terrible place for sound to actually live. The internal components are crowded, noisy, and prone to electrical interference from the CPU and GPU. On the flip side, that vintage Hi-Fi system was built for one thing: high-fidelity reproduction. Today, I’m showing you the shortcut I wish I knew years ago. We aren’t going to talk about thousand-dollar converters or complex networking. We’re talking about the cleanest, simplest way to get that warm, analog hug for your digital files. I’ve spent years learning how to find the source of a ground loop in home theater and fighting with messy cables, and I finally found the sweet spot. Have you ever felt like your high-end gear was just sitting there, underutilized because of a single missing connection?
Is This Old Gear Actually Worth the Effort?
You might be skeptical. Why not just buy a modern soundbar and call it a day? Well, the Silver Era of audio wasn’t just about aesthetics. A surprising white paper by the Audio Engineering Society (AES) highlights that many vintage amplifiers from the 1970s were over-engineered with discrete components that offer a dynamic range modern budget amps struggle to match. I found this out the hard way when I realized the reason your passive speakers sound quiet with a digital amp is often due to the lack of a robust power supply—something vintage gear has in spades. If you want that deep, punchy sound, you need those heavy transformers. My biggest early mistake was assuming that any old cord from a junk drawer would work. I wasted weeks trying to diagnose a ‘broken’ amp when the problem was just poor-quality shielding. Do not make my mistake and stop wasting money on expensive optical cables or gold-plated snake oil before you get the basic analog connection right.
Grab an RCA to 3.5mm Cable and Skip the Headaches
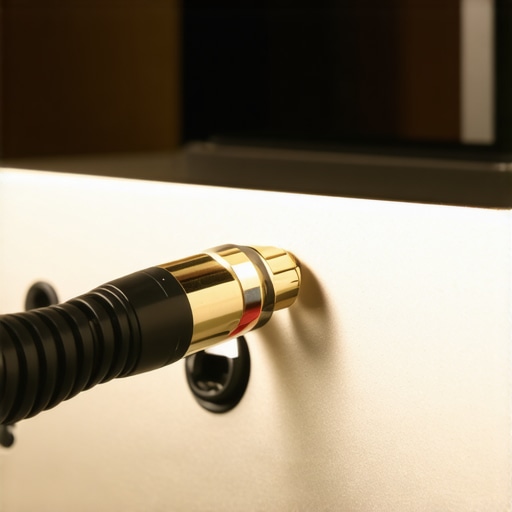
The most direct route between your laptop and that 70s powerhouse is a simple RCA-to-3.5mm “Y” cable. You plug the single headphone jack end into your PC and the red and white plugs into the back of your receiver. However, there is a golden rule: never use the “Phono” input. Phono stages are designed for the tiny voltage of a turntable needle and will distort your computer’s signal into a muddy mess. Stick to the “AUX,” “Tuner,” or “Tape In” ports. If you’re feeling a bit fancy or noticed a persistent hiss from your motherboard, an external USB DAC (Digital-to-Analog Converter) is your best friend. It takes the conversion job away from your noisy computer internals and gives your amp a cleaner signal to work with. Before you plug anything in, how to clean gold-plated connectors without ruining the finish is a quick skill to learn so you don’t introduce crackles into your setup from the get-go.
Set Your Windows Volume Once and Forget About It
One of the biggest mistakes I made early on was maxing out my PC volume and then barely turning the knob on my Pioneer. This actually raises the “noise floor,” which is just a technical way of saying you’ll hear more background static. Instead, set your computer volume to about 80% or 90% and use the physical knob on the receiver to control how loud the room gets. This keeps the signal-to-noise ratio high. If you hear a distinct click when you adjust things or change sources, don’t panic—it’s just the mechanical relays doing their job, and you can find out why your receiver clicks when you change the volume to put your mind at ease. If you find the sound is lacking punch or clarity, consider the best height for your desktop speakers on a small desk, as ear-level alignment is the cheapest “upgrade” you’ll ever make for better imaging.
The Polarity Mistake That Ruins Your Bass
I vividly remember the first time I got my 1974 Pioneer running. I was so excited I just shoved the speaker wires into the spring clips and hit play. The music sounded “hollow,” like it was coming from a different room, and the bass had completely disappeared. I spent an hour checking my PC audio settings and driver updates before I realized I had the wires swapped on one speaker—positive to negative. This created a “phase cancellation” where the two speakers were essentially fighting each other. I felt like a total amateur, but it’s a common rite of passage. If your setup sounds thin or weirdly centered, try the easy way to test if your speakers are out of phase to see if you made the same blunder. Once the wiring is solid, use the best way to label your messy home theater cables so you never have to trace a wire through a dark cabinet again. For those using older systems with small speakers, learning how to wire a subwoofer to a receiver with no sub out port can add that modern low-end thump that vintage bookshelf speakers sometimes lack on their own.
Most people think that once the cables are plugged in, the job is done. They spend hours debating the real difference between gold and silver plated connectors, but they ignore the mechanical reality of their gear. I used to be that guy. I’d buy the most expensive RCA cables I could find, yet the sound was still “choked.” Here is the contrarian truth: your cables matter far less than the physical state of the components inside that 1970s chassis. While we’re on the subject of myths, let’s talk about “instant” sound. Many audiophiles claim that break-in is a placebo, but research by Dr. Floyd Toole in Sound Reproduction confirms that some mechanical components, specifically speaker surrounds, do change their compliance over the first few hours of use. If you’re using a fresh set of drivers with an old amp, why your new speakers sound better after 20 hours of use isn’t just in your head; it’s physics. One massive “oops” factor I see constantly involves the allure of the “warm” tube sound. People get frustrated with the clinical nature of digital files and run out to buy the first glowy box they see online. They often overlook the hidden cost of buying a cheap tube amplifier, which often involves poor transformer winding and dangerous bias drift. If your vintage Pioneer or Marantz is losing its punch, it’s rarely the “digital” source to blame. It’s the internal plumbing. You need to know how to tell if your amps capacitors are failing because those 50-year-old electrolytic cans are the ticking time bombs of the audio world. If you ignore them, you’re not just getting bad sound; you’re risking a catastrophic failure of your power transformer. 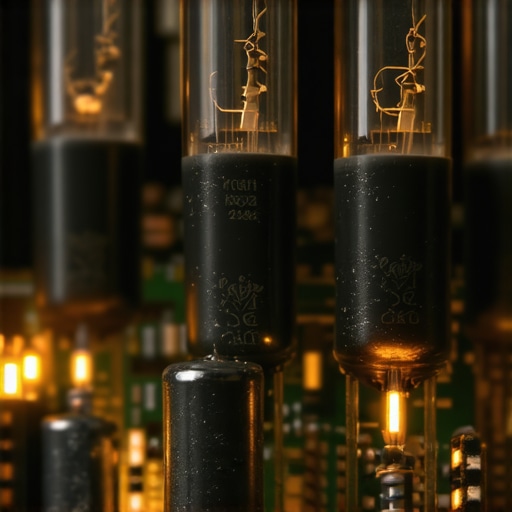
Is Your Room Actually the Weakest Link in Your Setup?
Sometimes the “expert” move isn’t buying more gear; it’s managing the gear you have. You might notice your system sounds amazing in one room but like a tin can in another. This isn’t usually the amp’s fault. High ceilings and hardwood floors create a chaotic mess of reflections that can make even a high-end system sound thin. Before you start tweaking digital EQ settings, try a “soft” upgrade. Knowing how to use a rug to stop your speakers from sounding harsh is a pro-level trick that fixes the frequency response more effectively than an expensive DAC ever could. Finally, keep an eye on the stereo balance. If the singer feels like they’re standing three feet to the left, you aren’t crazy—you likely have a worn potentiometer or a drifting resistor. Learning how to fix channel imbalance on a vintage stereo amplifier is the difference between a frustrating afternoon and a blissful listening session. Have you ever fallen into the trap of blaming your cables for a problem that was actually hidden deep inside the hardware or the room itself? Let me know in the comments.
Stop Using Canned Air on Your Dust
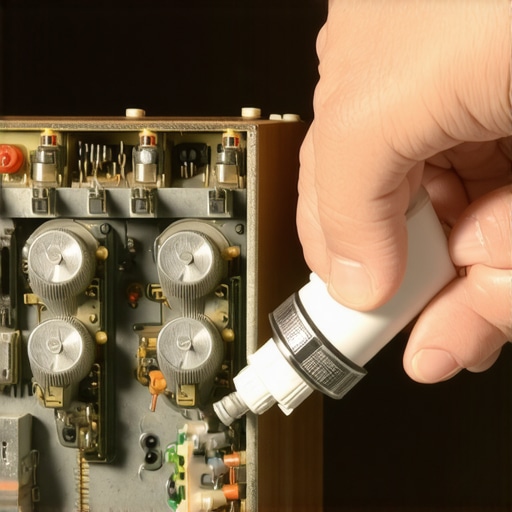
That scratchy ‘static’ sound you hear when turning the volume knob isn’t the ghost of music past; it’s oxidation. My first move with any piece of thrifted gear is to crack the case and reach for a can of DeoxIT D5. I’ve seen people use generic lubricants or, heaven forbid, WD-40, which eventually turns into a sticky sludge that kills the component. Learning how to fix a scratchy fader on a vintage audio mixer or receiver is the most empowering $15 skill you’ll ever acquire. While you’re in there, look at the paper. If your speakers look like they’ve survived a sandstorm, be careful. You need to know how to clean your speaker cones without ruining the paper because a heavy hand will turn a classic driver into a paperweight. If you bought your gear from a dusty attic or a heavy smoker’s den, you’ll definitely want to learn how to get the smell of smoke out of a vintage receiver before your living room starts smelling like a 1980s dive bar.
How Can I Keep This Gear Alive Forever?
The secret to longevity isn’t expensive cables; it’s heat management and electrical hygiene. Rod Elliott from Elliott Sound Products (ESP) famously notes that the lifespan of a quality amplifier is largely dictated by the operating temperature of its electrolytic capacitors. In fact, a 10°C increase in temperature can halve the life of those caps. This is why I always check how to tell if your amp is running too hot during long listening sessions. If it’s cooking, you need better airflow. I also keep a cheap multimeter on my desk at all times. It’s not just for pros; knowing how to use a multimeter to find a short in your speaker wires has saved me from blowing the output transistors on my Pioneer more times than I care to admit. A single stray strand of copper touching the chassis can send your amp into protection mode or simply fry the circuit. If you spot a physical crack in the foam around your drivers, don’t panic. I’ve had great success learning how to repair a tear in your speaker surround with rubber glue, which can give old woofers a second decade of life.
The Only Tool You Actually Need
I predict we are entering a ‘New-Stalgia’ era where the trend shifts from hunting purely for rusted-out vintage units to investing in high-end hybrids. We’re already seeing companies like JBL and NAD release ‘Classic’ editions that look like they belong in a 1974 catalog but include modern Class-D efficiency and high-res Bluetooth. But even if you go modern, the physics of sound don’t change. You will still need to manage your connections and keep an eye on component health. My advice? Don’t wait for a pop or a puff of smoke to start your maintenance routine. Grab a multimeter and check your speaker cable continuity tonight—it’s the easiest way to prevent a total system meltdown. Once the electrical side is safe, take a second to learn how to clean gold-plated connectors without ruining the finish to ensure that clean signal doesn’t get bottlenecked by a few microns of grime.
Lessons I Learned the Loud Way
Looking back at my journey with that 1974 Pioneer, the biggest takeaway wasn’t about the cables themselves, but about the patience required for old-school tech. I realized that a vintage Hi-Fi system is a living thing; it reacts to heat, dust, and even how often you turn the knobs. I used to panic at every little pop, but now I know how to tell if your speaker capacitors are starting to leak so I can fix problems before they become catastrophes. Another major shift in my thinking was moving away from the ‘more is better’ philosophy. You don’t need the volume at 11 to hear the details; you just need a clean signal path. I also discovered that why your old receiver pops when you switch inputs is usually just a sign of minor DC leakage that doesn’t always mean the end of the world. Trust your ears more than the forum experts—if it sounds warm and full to you, you’ve already won.
#IMAGE_PLACEHOLDER_E#
The Three Tools I Use Every Weekend
If you’re going to dive into the world of vintage audio, you need a small survival kit. First, a reliable multimeter is non-negotiable for troubleshooting shorts and ensuring your gear is safe to operate. Second, I always keep a bottle of contact cleaner on hand; it’s the single most effective way to restore scratchy knobs and silent channels. I also recommend checking local listings for old gems, using the trick to buying high-end audio at estate sales to score components that would otherwise cost thousands of dollars. Finally, I rely heavily on digital archives of original service manuals; having the blueprint of your specific receiver changes the game from guessing to knowing exactly where the signal is failing.
Start Your Analog Journey Tonight
There is a specific kind of magic that happens when you bridge the gap between your modern digital library and the heavy iron of a 1970s amplifier. It’s about more than just sound quality; it’s about the tactile experience and the history behind the hardware. Don’t let the fear of doing it wrong stop you from hearing your favorite tracks in a whole new light. We even saw success when discovering how we made a 20 thrift store speaker sound like a pro monitor just by pairing it with the right vintage power source. Your PC and that vintage receiver are just waiting for the right connection to bring the room to life. What’s the one piece of vintage gear you’ve been too afraid to plug in for fear of breaking it? Let’s figure it out together in the comments.