
I was cruising down the interstate last Tuesday, ready to belt out the chorus of a classic rock anthem, when I realized something was horribly wrong. It wasn’t just bad; it was muffled. My favorite guitar solo sounded like it was being played through three layers of wet wool and a bucket of swamp water. I remember hitting the dash in frustration, thinking my expensive components had finally kicked the bucket. We’ve all been there—that sinking feeling when your car’s cabin feels less like a concert hall and more like a submarine. If your audio lacks that crisp, punchy quality, you aren’t alone. Today, we are going to dry out that sound and get your highs back.
The Day My Car Audio Drowned
Early in my DIY audio journey, I made a massive mistake that still makes me cringe. I was convinced my receiver was the culprit for the muddy mess, so I ripped it out and replaced it with a top-tier model. Guess what? It still sounded like I was underwater. I had completely ignored the physical reality of the speakers themselves. Often, we look for electronic solutions when the problem is purely mechanical or environmental. For instance, the fact that your car speakers sound better with the windows up often comes down to cabin pressure and acoustics, not just the volume knob. If you’ve ever dealt with speakers that sound muffled, you know the urge to just buy new stuff is strong, but usually, it’s a simple fix that doesn’t involve a credit card.
Is My Entire System Actually Ruined?
It’s the question that keeps us up at night after a long drive through the rain: is this fix going to cost a fortune? The short answer is almost always no. Most of the time, that underwater sensation is caused by something as simple as phase cancellation or a loose panel. I’ve even seen people make the mistake of using home speakers in a car audio setup, which leads to massive impedance issues and a total loss of clarity that mimics being submerged. According to the experts at Audioholics, environmental factors like humidity can physically soften paper speaker cones over time, altering their frequency response significantly and causing a dull, muddy output. Before you reach for your wallet, ask yourself: have you noticed the sound getting progressively worse after a rainy week?
The Culprits Hiding in Your Door Panels
Sometimes the watery sound isn’t the speaker’s fault at all, but the environment we put them in. If you’ve recently done an upgrade, you might be dealing with a rattling plastic door panel that is eating your mid-range frequencies and making everything sound congested. I spent hours chasing a ghost in my wiring once, only to realize a piece of insulation had fallen and was resting directly on the cone. Have you ever felt like your music was drowning just as the bass hit? Drop a comment and tell me if you have faced this specific muffled nightmare lately, because we’re about to dive into the step-by-step fix that will bring your vocals back to the surface.
Stop the Muffle with These Hands-On Fixes
To get your audio out of the swamp, you need to start with the most common, yet overlooked, culprit: phase cancellation. Think of your speakers like a rowing team. If one person rows forward while the other rows backward, the boat goes nowhere. In audio, if one speaker pushes out while the other pulls in, they cancel each other out, leaving you with a thin, watery sound that lacks any punch.
Check if Your Speakers are Fighting Each Other
The easiest way to identify this is by listening to a track with heavy mono vocals. If the singer sounds like they are coming from the side mirrors rather than the dashboard, you are likely out of phase. I once spent six hours under a dashboard in 90-degree heat, sweat dripping into my eyes, only to find that the passenger door speaker had its leads reversed. The soundstage was so hollow it felt like a ghost was singing from the backseat. The second I flipped those wires, the music ‘snapped’ into the center of the car. You should use the easy way to test if your speakers are out of phase by using a simple 9V battery to see which way the cones pop.
Seal the Air Leaks for Better Bass
If your speaker isn’t sealed tightly against the door panel, the ‘back wave’ of the sound cancels out the ‘front wave.’ This is called an acoustical short circuit, and it is exactly why your music sounds like it is being played inside a plastic bin. Use foam baffles or sound deadening material to create a dedicated ‘room’ for that speaker. Vibration is the enemy of clarity; if your speaker is loose, it is not moving air efficiently. Check the mounting screws on your brackets. If you have recently done work, you might need to learn how to fix a rattling plastic door panel after a speaker upgrade to ensure the environment isn’t soaking up your mid-bass frequencies.
Optimize Your Wiring and Signal Path
If the physical install is solid, look at the signal. Are you sending deep bass to a tiny three-inch dash speaker? That is a recipe for distortion that sounds like mud. Set your high-pass filters correctly on your head unit or amplifier. Also, do not underestimate the importance of the copper itself. If you are running a high-powered system, using the best gauge wire for a 500-watt car subwoofer ensures your amp isn’t choking when the beat drops. Finally, once the hardware is singing, you can focus on how to balance your car audio for the drivers seat to pull that ‘submerged’ sound right up to ear level. This isn’t just about volume; it is about the timing and physical integrity of every component in the chain.Let’s dig deeper into the physics of why your audio still feels like it’s trapped in a cardboard box. Most people think that if their sound is thin or muffled, the solution is to simply buy a bigger, beefier amplifier. It’s a classic ‘more is better’ trap, but in my experience, raw wattage is rarely the cure for poor clarity. In fact, throwing power at a bad signal just gives you louder, more aggressive mud. The real nuance lies in gain structure and the digital-to-analog conversion happening before the signal even reaches your speakers. If you are starting with a low-quality source, the difference between cheap and expensive dacs that actually matters becomes painfully obvious once you amplify it.
More Watts Won’t Save a Bad Signal
A common mistake I see is the ‘Power Strip’ approach to car audio, where enthusiasts load up on equipment without considering the electrical foundation. You cannot expect a high-output system to perform if your car’s charging system is gasping for air. According to the Consumer Electronics Association (CEA-2006) standards, an amplifier’s rated power is often measured at 14.4 volts, yet most factory alternators struggle to maintain that under the heavy load of a modern sound system. This leads to voltage sag, which physically prevents the amplifier from controlling the speaker cone properly, resulting in that ‘underwater’ mush. If you are pushing serious power, you need to know how to stop your car battery from draining with a high-powered amp before you ruin your electronics.
Stop Treating Your Gain Control Like a Volume Knob
This is the single most destructive ‘oops’ factor in DIY audio. People often crank the gain setting on their amp to the maximum, thinking it’s a volume dial. It isn’t. The gain is there to match the output voltage of your head unit to the input sensitivity of the amplifier. When you over-crank it, you introduce clipping—where the tops and bottoms of the audio waves are literally cut off. This doesn’t just sound muffled; it creates heat that can melt voice coils. Have you ever noticed your music getting ‘crunchy’ or dull after twenty minutes of high-volume listening? That is likely thermal compression. You should learn how to tell if your amp is running too hot to prevent permanent damage to your gear.
Is Your Charging System Strong Enough for High Output?
For the sophisticated listener, the bottleneck is often the wire itself. I’ve seen $500 amplifiers choked by $10 power cables. If the wire is too thin, it acts like a resistor, converting your precious power into heat instead of sound. This is why using the best gauge wire for a 500-watt car subwoofer is non-negotiable for clarity. If you’ve addressed the wiring and still see your headlights dimming with every bass hit, it’s time to look at how to add a second battery for your high power car amp. High-end audio is a balance of electrical supply and mechanical execution. Have you ever fallen into the trap of thinking a bigger amp would fix a muddy signal? Let me know in the comments below!
Once you have addressed the electrical gremlins and physics of your installation, you enter the long game of audio ownership: keeping that pristine sound from degrading. It is a slow, silent process, but dust, oxidation, and heat are constantly working against your components. I have seen enthusiasts spend thousands on a setup only to let it wither because they did not know how to tell if your amps capacitors are failing before the unit simply refused to power on. Your equipment needs more than just a wipe-down; it needs a proactive maintenance schedule if you want it to last a decade or more.
Stop the Slow Decay of Your Components
The biggest enemy of a vintage receiver or a high-end car amp is simple oxidation. If you notice your audio cutting out or crackling, it is often just a dirty contact. I personally swear by DeoxIT D5; it is the industry standard for a reason. Whenever I pick up a used piece of gear, the first thing I do is learn how to clean a sticky volume knob on a vintage amp to ensure the signal path is as clean as possible. In your car, the vibrations and temperature swings are even more brutal. Check your connections every six months. A loose terminal can cause arcing, which leads to heat, which eventually leads to a melted fuse holder or a dead amplifier.
The Multimeter is Your New Best Friend
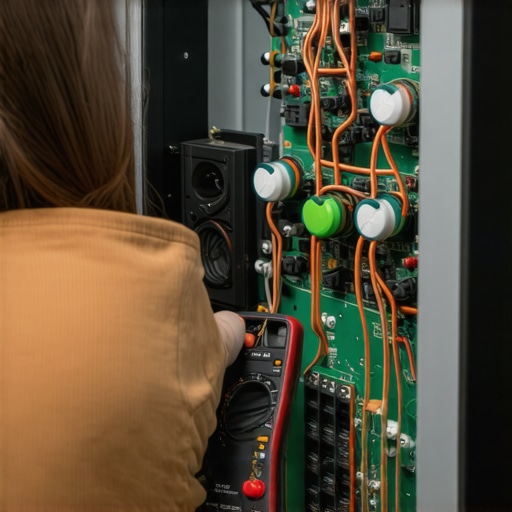
If you are serious about this hobby, you need a digital multimeter. I do not care if you only use it once a year; knowing the exact DC offset of your amplifier or the resistance of your voice coils is the difference between a pro and an amateur. When I am troubleshooting a system that sounds ‘off,’ I start by measuring the resting voltage. It helps me identify if the charging system is the culprit or if I have a physical hardware failure. This level of detail is also vital for smaller gear. For example, if you are struggling with the reason your wireless earbuds wont charge in their case anymore, a quick check of the contact pins can save you from buying a new pair. Similarly, knowing how to fix a loose charging port on your favorite bluetooth speaker often comes down to simple mechanical alignment that you can verify with basic tools.
How do I maintain my high-end system over time?
The key to longevity is consistency and organization. I highly recommend taking the time to learn the best way to label your messy home theater cables. When something goes wrong—and it will—you do not want to be playing a guessing game behind a dark rack of equipment. Furthermore, treat your new gear with respect from day one. I am a firm believer in the mechanical ‘settling’ period, so I always follow a guide on how to properly break in a new set of high end floor speakers to ensure the spiders and surrounds reach their optimal flexibility without being overdriven too early. According to Dr. Floyd Toole in his seminal work ‘Sound Reproduction,’ the physical environment and the consistency of the equipment’s performance are the two most critical variables in the ‘Circle of Confusion’ that plagues high-fidelity audio.
What the Future Holds for Home Calibration
I predict that within the next few years, the ‘manual’ part of this maintenance will start to vanish. We are already seeing the rise of AI-driven DSP (Digital Signal Processing) that can detect when a driver is failing or when a room’s acoustics have changed because you added a new sofa. However, until our speakers can repair their own capacitors, the responsibility lies with us. I want you to go out to your car or your living room right now and check one thing: your main power ground. If it is even slightly loose or rusted, tighten it. That one five-minute task could save your amplifier’s life and keep your music sounding like it is above water for years to come.
Hard Truths I Learned While Chasing Perfect Audio
After years of tearing out perfectly good head units and swearing at door panels, I realized that audio clarity is rarely about how much money you spend. It is about how much attention you pay to the physics of the environment. I used to think more power was the answer, but the loudest system in the world still sounds like garbage if your speakers are out of phase. One of the biggest lightbulb moments for me was realizing that environmental wear is a slow, silent killer. If you don’t stay on top of it, your expensive gear eventually becomes a glorified paperweight.
- Air is your biggest enemy: If your speaker isn’t sealed tightly to the mounting baffle, the sound waves will fight each other, resulting in that thin, watery sensation.
- The charging system is the foundation: Your amp is essentially a modulator for your car’s alternator. If your voltage is dipping, your sound quality is dipping right along with it.
- Visuals don’t equal quality: I’ve seen flashy gold connectors that performed worse than standard copper because the connection was loose.
My Go-To Kit for Keeping Sound Crystal Clear
When you are ready to stop guessing and start fixing, you need a few reliable tools in your arsenal. First, I never start a project without a high-quality Digital Multimeter to check the resistance of my voice coils. If you’re dealing with older gear, you need to understand the real difference between gold and silver plated connectors to know where your signal might be degrading. For maintenance, a bottle of DeoxIT D5 and a basic rubber glue kit can save a dying driver; I’ve even used it when learning how to repair a tear in your speaker surround with rubber glue instead of buying new speakers. If you are diving into the deep end of high-fidelity gear, I highly recommend reading ‘Sound Reproduction’ by Dr. Floyd Toole; it changed how I look at cabin acoustics forever. Also, if you’re shopping for upgrades, make sure you know how to tell if your amplifier is truly class a so you get the performance you’re paying for.
#IMAGE_PLACE_HOLDER_E#
Take the First Step Toward That Front Row Feeling
The journey from a muffled mess to a concert-hall experience doesn’t happen overnight, but it is one of the most rewarding DIY projects you can tackle. Don’t let the technical jargon intimidate you. Start with the basics: check your grounds, verify your phase, and clean those contacts. Once you eliminate the physical bottlenecks, your car audio will finally have the breath and life it was designed for. You deserve to hear every nuance of your favorite tracks, not just a muddy version of them. If you’ve been putting off a fix because you’re worried about the cost, remember that a screwdriver and some patience are often more valuable than a new set of speakers. If you ever run into a weird glitch, like how to fix the popping sound when you turn on your car stereo, tackle it head-on before it leads to a bigger failure. Have you ever spent hours chasing a sound issue only to find it was a single loose wire? Let me know your biggest facepalm moment in the comments below!