
I was standing there, sweat dripping into my eyes, holding a heavy level against the wall while my wife watched from the couch. She wanted the new soundbar perfectly centered under the 65-inch OLED. The problem? My stud finder was screaming at me that the only wooden support was four inches to the left of the center line. It felt like a cruel joke from the homebuilder. In a moment of pure impatience, I tried to use those flimsy little yellow plastic expansion anchors that came in the box. Big mistake. Two days later, I woke up at 3 AM to a sickening thud. I found my expensive audio gear dangling by its cables, having ripped a chunk of gypsum out of the wall like a loose tooth. If you have ever dealt with why your soundbar keeps turning itself off randomly, you know tech can be finicky, but physics is flat-out brutal.
Your Stud Finder is Not the Boss of You
Today, I am going to show you exactly how to bypass the ‘must hit a stud’ rule without ruining your living room. We are going to talk about real-world weight distribution and the hardware that actually works when you are flying solo on a sheet of drywall. You do not need a contractor, and you definitely do not need to settle for a lopsided setup just because of where the 2x4s are hiding. We are aiming for a rock-solid mount that looks professional and stays put. It is a bit like knowing how to stop your soundbar from blocking your TV remote sensor; it is all about the little details that prevent a major headache later. Have you ever had a mounting disaster that ended with a hole in the wall and a broken heart (and speaker)?
Is Drywall Really Strong Enough to Hold Your Gear?
I get the skepticism. Drywall feels like chalky cardboard because, well, it mostly is. However, according to the Gypsum Association, standard 1/2-inch drywall can support significant loads—often up to 50 pounds or more—if you use the right toggles to distribute that weight over a larger surface area. The trick is avoiding the ‘pull-out’ force. When I made my early mistake, I used anchors meant for sheer weight, not the outward pull of a heavy soundbar bracket. Now, I never trust those pack-in anchors. I have learned that even if you are figuring out how to fix a soundbar that has sound but no picture on ARC, the physical setup has to be the first thing you get right. If the foundation is shaky, nothing else matters.
Before we grab the drill, let’s talk about why we are doing this. A centered soundbar is not just about aesthetics; it is about the soundstage. If your bar is off-center, your ears will notice the imbalance, much like how to tell if your speakers are out of phase in 30 seconds by the weird, hollow feeling in the room. We want that audio coming directly at you. Let’s dive into the hardware that makes this ‘stud-less’ miracle possible.
Forget Those Flimsy Plastic Plugs
You need to ditch the mounting kit that came in the box. Most soundbar manufacturers include generic wall anchors that are only rated for concrete or for hitting wood studs directly. For a pure drywall install, you want 3/16-inch or 1/4-inch toggle bolts. These are the heavy hitters of the hardware aisle. When I first used them to mount a massive Atmos-enabled bar, I was terrified the weight would pull a square of gypsum right out of the wall. But once those metal wings snapped open behind the board, I realized I could have probably hung a whole bicycle on that bracket. It is a lot like the trick to making cheap bookshelf speakers sound expensive; using the right structural foundation makes the equipment perform better because it is not vibrating against a loose screw.
The Butterfly Wing Technique
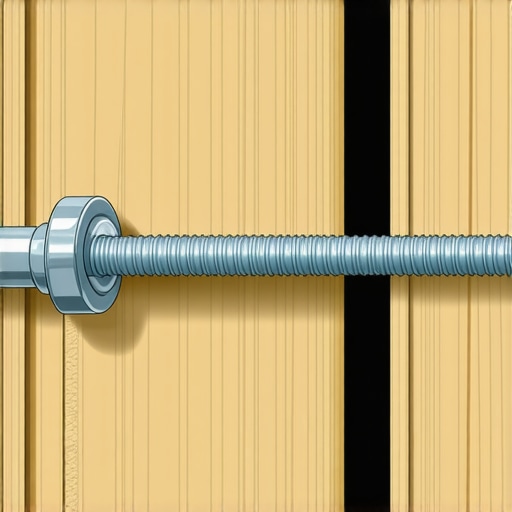
The magic of the toggle bolt is the ‘butterfly’ mechanism. You fold the metal wings flat, push them through a pre-drilled hole, and they spring open on the other side. This spreads the pressure across several inches of drywall rather than a single point. I remember helping a friend who was terrified of drilling into his pristine apartment walls. He was convinced we needed a stud, but after we secured the first toggle, he actually tried to pull the bracket off with his full body weight. It didn’t budge. This level of physical stability is just as important as knowing how to tell if your speaker is actually blown or just rattling; if the mount is loose, you will get sympathetic vibrations that ruin your clarity.
Drill Big or Go Home
One thing that catches people off guard is the size of the hole. For a toggle bolt to pass through, you usually need a 1/2-inch drill bit. It feels wrong to drill such a massive hole in your wall, but it is necessary for the butterfly mechanism to clear the drywall. If you are worried about the wall’s integrity, remember that the simple paper test for finding air leaks in your speaker cabinet is about finding small, unwanted gaps, but here, we want a clean, intentional gap for the hardware. I once hesitated and tried to force a toggle through a too-small hole, and I ended up snapping the plastic pull-tie, leaving the metal wing lost forever inside the wall cavity. Just commit to the bit size specified on the hardware package.
Why Your Center Channel Position Matters
Placement is everything. Just as you have learned why your center channel should never be placed on the floor, mounting your soundbar at ear level is the ultimate goal. Use a bubble level and mark your holes with a pencil. If your soundbar has a paper template, tape it to the wall and check it from across the room before you drill. I once mounted a bar slightly skewed, and every time I watched a movie, the slight tilt drove me crazier than a ground loop hum. You want it perfectly parallel to the bottom of the TV to keep the soundstage unified. Once the holes are drilled, thread the bolt through the soundbar bracket first, then screw on the toggle wing. Push it through until you hear that satisfying ‘click’. Pull the bracket toward you to put tension on the wings and tighten the bolt with a manual screwdriver. Avoid power drills for the final tightening so you do not accidentally crush the drywall core.
Establishing that firm anchor point is only half the battle; the real expertise comes in understanding the material science of your living room wall. Everyone says you must hit a stud, but in my experience, four well-placed toggle bolts can actually offer more load-bearing stability for a centered soundbar than one off-center wood screw that might be splitting the timber. However, the biggest trap you can fall into is treating drywall like it is indestructible. If you ignore the ‘soft’ variables of your home, even the best hardware will fail.
The Danger of the Over-Tightening Trap
This is the ultimate ‘oops’ factor for soundbar installations. When you use an impact driver or a high-torque power drill to finish the job, you risk crushing the gypsum core between the toggle wing and the bracket. Once that core turns into white powder, the anchor loses its grip. It is remarkably similar to the mistake that kills your portable speaker battery life; pushing a component past its physical tolerance doesn’t make it work better—it just ensures an early grave. Always finish the last few rotations by hand. You want the bracket to be snug against the wall, not embedded in it. If you feel the resistance suddenly ‘give’ while tightening, you have likely overdone it and compromised the hole.
Why do some heavy-duty anchors fail in humid environments?
The performance of your mounting hardware is inextricably linked to the health of your walls. According to the Gypsum Association GA-216 specifications, the load-bearing capacity of drywall is calculated based on dry, stable conditions. If you are mounting a soundbar on a wall that shares plumbing with a bathroom, or if you live in a high-humidity area, the gypsum can lose a significant percentage of its structural rigidity. I have seen anchors that were rated for 100 pounds pull right through the wall because the board was ‘soft.’ This is the same reason you use the simple paper towel trick for finding speaker air leaks; you are looking for subtle structural weaknesses that are not visible to the naked eye. Before committing to a stud-less mount, press your thumb firmly against the wall. If there is any flex or ‘sponginess,’ you must find a stud, regardless of what the anchor box promises.
Stop Letting Your Wall Muffle Your Audio
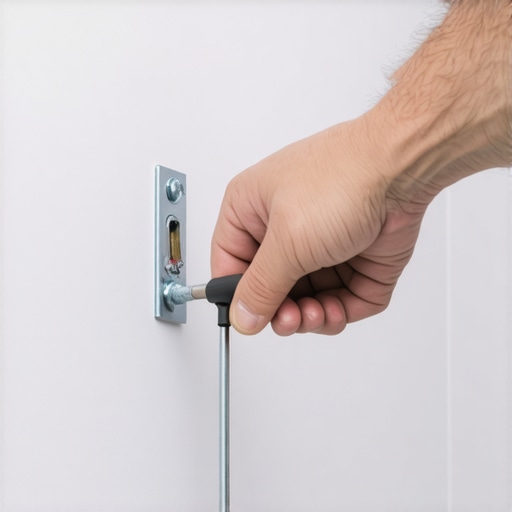
Another high-level mistake is ignoring the resonance of the wall itself. When you bolt a powerful soundbar directly to a sheet of drywall, the wall becomes an extension of the speaker cabinet. Because drywall is thin and lightweight, it tends to vibrate at specific frequencies, creating a muddy or ‘boomy’ sound. You can use the trick to making cheap bookshelf speakers sound expensive by adding a small layer of decoupling material. I often use thin adhesive rubber pads or even a small strip of weatherstripping between the bracket and the drywall. This breaks the mechanical connection and prevents the wall from coloring the audio. It is a similar concept to why your speakers’ bass port should never be pushed against a wall; you want the sound to come from the drivers, not from the surface they are sitting on. If your mount is too tight and lacks any damping, you might find yourself troubleshooting audio distortion that is not actually coming from the speaker. Getting the physical installation right is just as important as the initial setup, much like knowing how to properly break in new headphones without using white noise. Have you ever fallen into this trap or ignored the wall’s vibration? Let me know in the comments below, I would love to hear your horror stories—or your wins!
Keep the Magic Alive Long After the Unboxing
Once the mounting is finished and the dust has settled, I have found that the real challenge begins: longevity. I used to think that once a speaker was on the wall, it was a set-it-and-forget-it deal. But audio gear is a collection of moving parts and sensitive electronics. If you notice your audio sounding crackly or inconsistent after a few months, you can often fix a scratchy volume dial with electrical contact cleaner or clean the internal ribbon cables that might have shifted during that DIY mounting process. I always keep a can of DeoxIT D5 in my drawer for exactly this reason. It is a lifesaver for making sure your connections stay as conductive as the day you bought them.
How do I maintain my audio gear’s performance over the years?
Maintenance is mostly about thermal management and cleanliness. In my experience, heat is the silent killer of home theater gear. If you have your soundbar or receiver tucked into a tight cabinet without airflow, you will eventually learn why your receiver’s protection mode keeps triggering at high volume. The internal capacitors cook themselves until they fail. Even for soundbars, that small internal amp needs a bit of breathing room to avoid ‘thermal throttling’ which degrades your sound quality. According to technical documentation from the Audio Engineering Society (AES), specifically the AES2-2012 standards for speaker aging, maintaining a stable operating temperature is the single most effective way to prevent permanent driver fatigue.
Measure Twice and Adjust Your EQ Once
As you scale your system, you might want to add more speakers or a beefier amp. This is where the secret to choosing the right ohm rating for your amp becomes vital. I once watched a friend try to daisy-chain a set of vintage towers to his soundbar’s auxiliary output, only to have the whole system shut down because the impedance dropped too low. If you are integrating older components, remember that your vintage amp gets hot even when you aren’t playing music due to the way old class-A or early class-AB circuits draw idle current. Keep them separated from your new tech to avoid heat transfer.
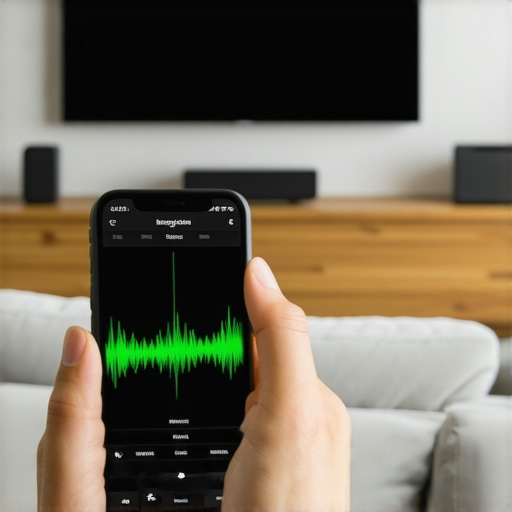
To truly master your space, I recommend getting scientific with your phone. You can easily use your phone to measure your room’s frequency response using a free RTA (Real Time Analyzer) app. I do this every time I add a new rug or move a chair. It is wild how much a simple furniture shift can change your bass response. I predict that within the next five years, AI-driven room correction will be built into even the cheapest soundbars, using always-on microphones to adjust the sound signature in real-time as the room environment changes. Until then, the manual check is your best bet. Try downloading a free RTA app tonight and walk around your room while playing a pink noise track—it is the fastest way to find exactly where your bass is hiding!
I was standing there, sweat dripping into my eyes, holding a heavy level against the wall while my wife watched from the couch. She wanted the new soundbar perfectly centered under the 65-inch OLED. The problem? My stud finder was screaming at me that the only wooden support was four inches to the left of the center line. It felt like a cruel joke from the homebuilder. In a moment of pure impatience, I tried to use those flimsy little yellow plastic expansion anchors that came in the box. Big mistake. Two days later, I woke up at 3 AM to a sickening thud. I found my expensive audio gear dangling by its cables, having ripped a chunk of gypsum out of the wall like a loose tooth. If you have ever dealt with why your soundbar keeps turning itself off randomly, you know tech can be finicky, but physics is flat-out brutal.
Your Stud Finder is Not the Boss of You
Today, I am going to show you exactly how to bypass the ‘must hit a stud’ rule without ruining your living room. We are going to talk about real-world weight distribution and the hardware that actually works when you are flying solo on a sheet of drywall. You do not need a contractor, and you definitely do not need to settle for a lopsided setup just because of where the 2x4s are hiding. We are aiming for a rock-solid mount that looks professional and stays put. It is a bit like knowing how to stop your soundbar from blocking your TV remote sensor; it is all about the little details that prevent a major headache later. Have you ever had a mounting disaster that ended with a hole in the wall and a broken heart (and speaker)?
Is Drywall Really Strong Enough to Hold Your Gear?
I get the skepticism. Drywall feels like chalky cardboard because, well, it mostly is. However, according to the Gypsum Association, standard 1/2-inch drywall can support significant loads—often up to 50 pounds or more—if you use the right toggles to distribute that weight over a larger surface area. The trick is avoiding the ‘pull-out’ force. When I made my early mistake, I used anchors meant for sheer weight, not the outward pull of a heavy soundbar bracket. Now, I never trust those pack-in anchors. I have learned that even if you are figuring out how to fix a soundbar that has sound but no picture on ARC, the physical setup has to be the first thing you get right. If the foundation is shaky, nothing else matters.
Before we grab the drill, let’s talk about why we are doing this. A centered soundbar is not just about aesthetics; it is about the soundstage. If your bar is off-center, your ears will notice the imbalance, much like how to tell if your speakers are out of phase in 30 seconds by the weird, hollow feeling in the room. We want that audio coming directly at you. Let’s dive into the hardware that makes this ‘stud-less’ miracle possible.
Forget Those Flimsy Plastic Plugs
You need to ditch the mounting kit that came in the box. Most soundbar manufacturers include generic wall anchors that are only rated for concrete or for hitting wood studs directly. For a pure drywall install, you want 3/16-inch or 1/4-inch toggle bolts. These are the heavy hitters of the hardware aisle. When I first used them to mount a massive Atmos-enabled bar, I was terrified the weight would pull a square of gypsum right out of the wall. But once those metal wings snapped open behind the board, I realized I could have probably hung a whole bicycle on that bracket. It is a lot like the trick to making cheap bookshelf speakers sound expensive; using the right structural foundation makes the equipment perform better because it is not vibrating against a loose screw.
The Butterfly Wing Technique
The magic of the toggle bolt is the ‘butterfly’ mechanism. You fold the metal wings flat, push them through a pre-drilled hole, and they spring open on the other side. This spreads the pressure across several inches of drywall rather than a single point. I remember helping a friend who was terrified of drilling into his pristine apartment walls. He was convinced we needed a stud, but after we secured the first toggle, he actually tried to pull the bracket off with his full body weight. It didn’t budge. This level of physical stability is just as important as knowing how to tell if your speaker is actually blown or just rattling; if the mount is loose, you will get sympathetic vibrations that ruin your clarity.
Drill Big or Go Home
One thing that catches people off guard is the size of the hole. For a toggle bolt to pass through, you usually need a 1/2-inch drill bit. It feels wrong to drill such a massive hole in your wall, but it is necessary for the butterfly mechanism to clear the drywall. If you are worried about the wall’s integrity, remember that the simple paper test for finding air leaks in your speaker cabinet is about finding small, unwanted gaps, but here, we want a clean, intentional gap for the hardware. I once hesitated and tried to force a toggle through a too-small hole, and I ended up snapping the plastic pull-tie, leaving the metal wing lost forever inside the wall cavity. Just commit to the bit size specified on the hardware package.
Why Your Center Channel Position Matters
Placement is everything. Just as you have learned why your center channel should never be placed on the floor, mounting your soundbar at ear level is the ultimate goal. Use a bubble level and mark your holes with a pencil. If your soundbar has a paper template, tape it to the wall and check it from across the room before you drill. I once mounted a bar slightly skewed, and every time I watched a movie, the slight tilt drove me crazier than a ground loop hum. You want it perfectly parallel to the bottom of the TV to keep the soundstage unified. Once the holes are drilled, thread the bolt through the soundbar bracket first, then screw on the toggle wing. Push it through until you hear that satisfying ‘click’. Pull the bracket toward you to put tension on the wings and tighten the bolt with a manual screwdriver. Avoid power drills for the final tightening so you do not accidentally crush the drywall core.
Establishing that firm anchor point is only half the battle; the real expertise comes in understanding the material science of your living room wall. Everyone says you must hit a stud, but in my experience, four well-placed toggle bolts can actually offer more load-bearing stability for a centered soundbar than one off-center wood screw that might be splitting the timber. However, the biggest trap you can fall into is treating drywall like it is indestructible. If you ignore the ‘soft’ variables of your home, even the best hardware will fail.
The Danger of the Over-Tightening Trap
This is the ultimate ‘oops’ factor for soundbar installations. When you use an impact driver or a high-torque power drill to finish the job, you risk crushing the gypsum core between the toggle wing and the bracket. Once that core turns into white powder, the anchor loses its grip. It is remarkably similar to the mistake that kills your portable speaker battery life; pushing a component past its physical tolerance doesn’t make it work better—it just ensures an early grave. Always finish the last few rotations by hand. You want the bracket to be snug against the wall, not embedded in it. If you feel the resistance suddenly ‘give’ while tightening, you have likely overdone it and compromised the hole.
Why do some heavy-duty anchors fail in humid environments?
The performance of your mounting hardware is inextricably linked to the health of your walls. According to the Gypsum Association GA-216 specifications, the load-bearing capacity of drywall is calculated based on dry, stable conditions. If you are mounting a soundbar on a wall that shares plumbing with a bathroom, or if you live in a high-humidity area, the gypsum can lose a significant percentage of its structural rigidity. I have seen anchors that were rated for 100 pounds pull right through the wall because the board was ‘soft.’ This is the same reason you use the simple paper towel trick for finding speaker air leaks; you are looking for subtle structural weaknesses that are not visible to the naked eye. Before committing to a stud-less mount, press your thumb firmly against the wall. If there is any flex or ‘sponginess,’ you must find a stud, regardless of what the anchor box promises.
Stop Letting Your Wall Muffle Your Audio
Another high-level mistake is ignoring the resonance of the wall itself. When you bolt a powerful soundbar directly to a sheet of drywall, the wall becomes an extension of the speaker cabinet. Because drywall is thin and lightweight, it tends to vibrate at specific frequencies, creating a muddy or ‘boomy’ sound. You can use the trick to making cheap bookshelf speakers sound expensive by adding a small layer of decoupling material. I often use thin adhesive rubber pads or even a small strip of weatherstripping between the bracket and the drywall. This breaks the mechanical connection and prevents the wall from coloring the audio. It is a similar concept to why your speakers’ bass port should never be pushed against a wall; you want the sound to come from the drivers, not from the surface they are sitting on. If your mount is too tight and lacks any damping, you might find yourself troubleshooting audio distortion that is not actually coming from the speaker. Getting the physical installation right is just as important as the initial setup, much like knowing how to properly break in new headphones without using white noise. Have you ever fallen into this trap or ignored the wall’s vibration? Let me know in the comments below, I would love to hear your horror stories—or your wins!
Keep the Magic Alive Long After the Unboxing
Once the mounting is finished and the dust has settled, I have found that the real challenge begins: longevity. I used to think that once a speaker was on the wall, it was a set-it-and-forget-it deal. But audio gear is a collection of moving parts and sensitive electronics. If you notice your audio sounding crackly or inconsistent after a few months, you can often fix a scratchy volume dial with electrical contact cleaner or clean the internal ribbon cables that might have shifted during that DIY mounting process. I always keep a can of DeoxIT D5 in my drawer for exactly this reason. It is a lifesaver for making sure your connections stay as conductive as the day you bought them.
How do I maintain my audio gear’s performance over the years?
Maintenance is mostly about thermal management and cleanliness. In my experience, heat is the silent killer of home theater gear. If you have your soundbar or receiver tucked into a tight cabinet without airflow, you will eventually learn why your receiver’s protection mode keeps triggering at high volume. The internal capacitors cook themselves until they fail. Even for soundbars, that small internal amp needs a bit of breathing room to avoid ‘thermal throttling’ which degrades your sound quality. According to technical documentation from the Audio Engineering Society (AES), specifically the AES2-2012 standards for speaker aging, maintaining a stable operating temperature is the single most effective way to prevent permanent driver fatigue.
Measure Twice and Adjust Your EQ Once
As you scale your system, you might want to add more speakers or a beefier amp. This is where the secret to choosing the right ohm rating for your amp becomes vital. I once watched a friend try to daisy-chain a set of vintage towers to his soundbar’s auxiliary output, only to have the whole system shut down because the impedance dropped too low. If you are integrating older components, remember that your vintage amp gets hot even when you aren’t playing music due to the way old class-A or early class-AB circuits draw idle current. Keep them separated from your new tech to avoid heat transfer.
To truly master your space, I recommend getting scientific with your phone. You can easily use your phone to measure your room’s frequency response using a free RTA (Real Time Analyzer) app. I do this every time I add a new rug or move a chair. It is wild how much a simple furniture shift can change your bass response. I predict that within the next five years, AI-driven room correction will be built into even the cheapest soundbars, using always-on microphones to adjust the sound signature in real-time as the room environment changes. Until then, the manual check is your best bet. Try downloading a free RTA app tonight and walk around your room while playing a pink noise track—it is the fastest way to find exactly where your bass is hiding!
Lessons I Learned While Patching Holes in My Drywall
After years of trial and error, I have realized that the wall isn’t your enemy—it is usually just misunderstood. Here are a few things I wish someone had told me before I started drilling into my living room:
- The ‘Tap Test’ is Often a Lie: Do not rely on knocking to find support. If you aren’t using a stud, assume the drywall is your only support and use hardware rated for double the weight of your bar to be safe.
- HDMI Cables are Shorter Than They Look: Before you lock those toggles, make sure your cables have enough slack. If you notice a sync issue later, you might need to know how to fix the audio delay on your soundbar through the digital settings rather than fighting with the physical wires.
- Dust Management is Key: Drywall dust is incredibly abrasive. Use a vacuum or a sticky note ‘dust catcher’ while drilling to keep particles out of your speaker’s sensitive ports.
Gear That Saved My Walls and My Sanity
If you want to mount your soundbar like a pro, you need more than just a drill. I trust these specific items because they have saved my equipment from gravity more than once:
- Toggler Snaptoggles: These are the only anchors I trust for heavy Atmos-enabled soundbars. They don’t fall behind the wall if you need to remove the bolt, making them worth every penny.
- Electrical Contact Cleaner: When I’m working on a setup, I always take a second to fix a scratchy volume dial with electrical contact cleaner on any connected legacy gear.
- A Heavy-Duty Spirit Level: Avoid phone apps for this. A physical level is far more accurate over the 40-inch span of a modern soundbar.
#IMAGE_PLACEHOLDER_E#
Give Your Soundbar the Foundation It Deserves
Mounting your audio equipment without a stud doesn’t have to be a gamble. By using the right toggles and respecting the material limits of your drywall, you can create a professional, perfectly centered look that enhances your home theater. Remember that a stable mount is the first step toward audio nirvana. If you start hearing unwanted noises once everything is powered up, it might be time to learn how to get rid of ground loop hum in your audio setup to ensure your sound is as clean as your installation. You have the knowledge now—go ahead and get that drill ready. Have you ever had a mounting anchor fail on you, or did you get it right on the first try? Let me know in the comments below!