
I was sitting in my favorite leather chair at 2 AM, the room bathed in nothing but the soft orange warmth of my power tubes, when I saw it—a ghostly, shimmering blue aura clinging to the inside of the glass. My heart skipped. I’d spent months saving for this amp, and in that moment, I was sure I was watching an expensive firework display waiting to happen. I lunged for the power switch faster than a cat chasing a laser pointer. It’s a terrifying sight if you aren’t expecting it. We are taught that orange is “warm and good” in the tube world, so anything shifting toward the UV spectrum feels like a total meltdown. But after hours of panicked research and a few calls to guys who have been soldering since the Nixon administration, I realized I was worried about nothing. Today, I’m going to settle your nerves and explain exactly why your amplifier is putting on a light show, which colors are safe, and the one specific “blue” that actually means your gear is in trouble.
That Eerie Blue Aura Isn’t a Ghost
[image_placeholder] Most of the time, that blue glow is actually a sign of a very high-quality vacuum. It’s often just fluorescence caused by stray electrons hitting the glass envelope or other internal structures. I made the mistake early on of thinking every weird color meant I needed to learn how to fix channel imbalance or start replacing parts immediately. I even once convinced myself my vintage receiver hum was somehow related to the light, which was total nonsense. According to historical technical documentation from the RCA Receiving Tube Manual, this blue glow on the glass is a harmless result of electron bombardment and actually indicates a very “hard” or strong vacuum. Have you ever seen your tubes change color when you crank the volume, or does it stay constant? Drop a comment and let me know—I’m curious if yours looks like a nebula or a neon sign.
Does This Mean My Expensive Tubes are Dying?
This is the big fear, right? We’ve all heard horror stories about “gassy” tubes. When a tube loses its vacuum, gas molecules inside get ionized, creating a distinct glow. But here is the trick: “bad” blue usually glows between the internal elements, while “good” blue sticks to the surface of the glass itself. If you see a cloudy, purple-blue mist filling the space between the metal plates, that’s when you should check if your capacitors are starting to leak or if the tube has finally given up the ghost. Most of the time, though, you’re just seeing the beautiful physics of high-voltage audio in action.
Identify Where the Glow Lives Before You Pull the Plug
To figure out if your amp is healthy or dying, you have to play detective with your eyes. Think of the tube like a window: a little condensation on the glass is fine, but smoke inside the room is a disaster.
Watch the Glass Surface Like a Hawk
If that blue shimmer is clinging to the inside of the glass—almost like it is painted on—you are in the clear. This is fluorescence. It happens when stray electrons, which are usually supposed to hit the plate, miss their target and smack into the glass instead. It is a sign of a ‘hard’ vacuum, meaning there is very little air inside to get in the way. I remember my first Dynaco rebuild; I was so focused on this blue glow that I missed the fact that one of my EL34 plates was starting to glow a dull, angry cherry red. That isn’t physics; that is thermal runaway. I had to learn the hard way that while blue on the glass is a friend, red on the metal is an enemy that will cook your output transformer in minutes. 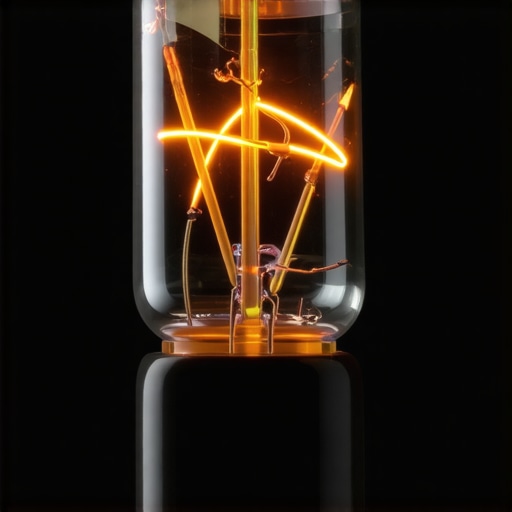
Check the Space Between Internal Plates
Now, if the blue light isn’t on the glass but is a cloudy, three-dimensional mist sitting right between the metal structures, you have a ‘gassy’ tube. This gas acts like a bridge for electricity where there shouldn’t be one. If you notice this alongside a nasty hum, you should investigate how to get rid of ground loop hum in your audio setup just to rule out external issues, but usually, that misty blue means the tube is toast.
Maintenance Tasks to Keep the Light Show Safe
Keeping your tubes healthy isn’t just about watching the lights; it’s about the environment you create for them.
Stop the Heat Soak Immediately
Tubes generate a massive amount of heat, and if that heat has nowhere to go, the internal seals can fail. This is why you should never place your turntable on top of your receiver or stack other gear directly above the vents. I have seen beautiful vintage McIntosh units scorched because the owner wanted to save shelf space. Give them at least six inches of breathing room.
Clean the Connection Points
Sometimes a flickering light or a crackle isn’t the tube failing, but a dirty pin. While you are checking your gear, learning how to fix a scratchy volume knob on an old amp often involves the same contact cleaners you would use for tube sockets. Use a dedicated electronic cleaner on the pins to ensure a solid, arc-free connection. If you suspect an internal electrical issue is causing your tubes to behave strangely, you might need to learn how to use a multimeter to find a short in your speaker wires or check the internal power rails. A stable power supply is the only way to keep those electrons moving where they belong instead of bouncing off the glass walls.
While identifying the location of that blue glow is the first step, the real expertise comes from knowing how that light interacts with the rest of your signal chain. Most audiophiles will tell you that you need to ‘burn in’ new tubes for hundreds of hours to get the best tone, but I am going to challenge that common belief. In my experience, if a tube doesn’t sound right within the first hour of reaching thermal stability, no amount of ‘seasoning’ is going to fix a fundamental mismatch or a manufacturing defect. While the truth about speaker break-in periods involves actual mechanical parts like spiders and surrounds loosening up, a vacuum tube is a static electronic component. If the blue glow is stable and the sound is crisp, stop watching the clock and start listening to the music.
Why Your High-Wattage Amp Still Sounds Thin
One of the biggest traps I see beginners fall into is chasing high wattage numbers to ‘fix’ a weak-sounding system. You might see that beautiful blue fluorescence and think your amp is working hard, but then wonder the reason your passive speakers sound quiet with a digital amp or even a tube one. The ‘oops’ factor here is usually an impedance mismatch. A high-wattage amp into the wrong speaker load is like a race car trying to drive through deep mud; you have the power, but no traction. This mismatch can actually cause the tubes to draw more current than they should, intensifying the blue glow on the glass as stray electrons become more aggressive. Before you buy more power, ensure your speaker sensitivity is actually a match for your tube’s output transformer. 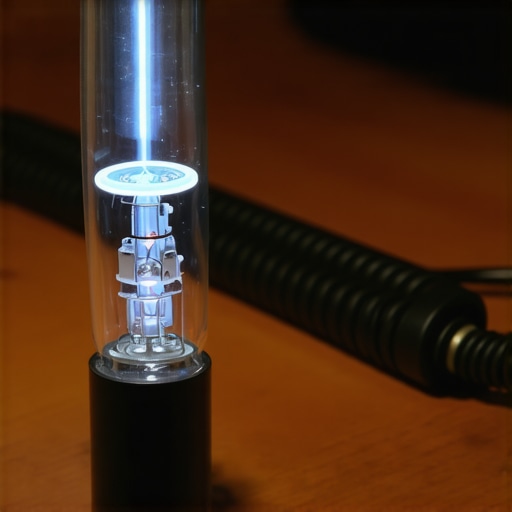
Can Balanced Cables Actually Make Your Tube Amp Quieter?
Advanced users often rush to buy XLR gear, assuming it’s the gold standard. However, the difference between balanced and unbalanced cables for home studios and hifi setups is often overstated for short runs. Legendary amplifier designer Nelson Pass has noted in various technical papers that a simple, well-designed short-run unbalanced circuit can often provide a more transparent signal path than a complex balanced circuit that requires extra stages of phase inversion. If you are chasing a ghost in your system, sometimes simplifying the path is better than adding more ‘pro’ gear. You might also find that if your low end feels disconnected from the glow of your mids, you need to learn how to match your subwoofer phase with your main speakers to create a cohesive soundstage. Have you ever fallen into the trap of buying more gear to fix a problem that was actually just a setting or a simple physics mismatch? Let me know in the comments.
Most of the horror stories I hear from people buying used gear could have been avoided with ten minutes of preventative care. I keep a dedicated ‘audio survival kit’ in my desk, and the MVP is always a can of DeoxIT D5. If you’ve ever touched a dial and heard a sound like dry leaves crunching, you’re dealing with oxidation. Learning how to fix a scratchy volume knob on an old amp isn’t just about the noise; it’s about preventing micro-arcing that can eventually lead to channel failure. While you’re in there, don’t forget to look at the gold. I’ve seen people use abrasive kitchen cleaners on their jacks, which is a tragedy. You need to know how to clean gold-plated connectors without ruining the finish if you want your signal to stay pure.
How do I keep my vintage gear running for another forty years?
The secret isn’t in a magic ritual; it’s in the capacitors. According to the technical deep-dives in the Radiotron Designer’s Handbook by F. Langford-Smith, electrolytic capacitors are the ticking time bombs of the audio world. They contain a chemical paste that dries out over decades, shifting their values and stressing your transformers. If you don’t know how to tell if your speaker capacitors are starting to leak, you are essentially playing Russian Roulette with your crossovers. I personally make it a habit to pull the covers off my main amp every two years just to look for ‘bulging’ or ‘crusting’ on the caps. It sounds tedious, but it’s the difference between a fifty-dollar part replacement and a five-hundred-dollar repair bill for a blown power transformer. 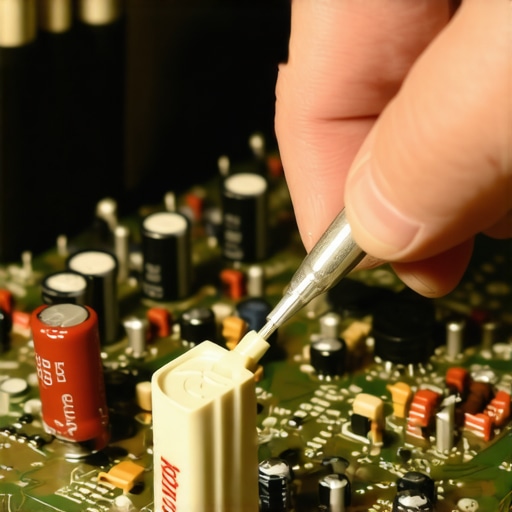
Stop the Foam Rot Before it Eats Your Bass
It’s not just the electronics that age; it’s the physical components of your speakers. If you find a pair of legendary Advents or JBLs at a yard sale, the woofers will likely look like they’ve been chewed by a dog. This is foam rot. You don’t have to throw them away. Learning how to revive old speakers with new foam surrounds is a rite of passage for any true enthusiast. It’s a messy, glue-filled afternoon, but the reward is a speaker that performs exactly as it did in 1978. If the cone itself is intact, you can even look into how to revive a vintage speaker cone with simple rubber treatment to keep the material supple and responsive.
The One Tool Every Audiophile Needs to Own
If you don’t own a basic digital multimeter, you are essentially flying blind. I use mine for everything from checking bias on my tubes to making sure my speaker wires aren’t shorting out against a metal rack. If your amp keeps going into protection mode, you need to learn how to use a multimeter to find a short in your speaker wires immediately. It’s the fastest way to rule out ‘user error’ before you blame the hardware. As for the future, I predict we will see smart amplifiers with built-in AI diagnostics that can predict component failure weeks before a capacitor actually pops. Until then, we have to rely on our eyes and our meters. Advanced Tip: Grab your multimeter tonight and check the DC offset at your speaker terminals; if it’s over 50mV, your amp needs a professional bias adjustment.
Scaling for the Ultimate Soundstage
If you feel like your system has plateaued, the answer isn’t always ‘more power.’ Sometimes it’s about distribution. I’ve found that why two small subwoofers are better than one massive driver is the most underrated logic in home audio. It smooths out the room modes and makes the bass feel like it’s part of the music rather than an intruder in the room. If you are struggling with a system that sounds ‘small,’ try adding a second identical sub before you trade in your floorstanders.
Three Myths About Vacuum Tubes That Keep Audiophiles Up at Night
After years of staring into the guts of various amplifiers, I have realized that much of what we fear is actually just physics doing its job. First, there is the myth that a blue glow always equals a gas leak. As we have discussed, fluorescence on the glass is a mark of a high-quality vacuum, not a failure. Second, many beginners believe that if one tube glows brighter than the others, it is ‘working harder’ and will die sooner. In reality, variations in glass thickness and phosphor coating can change the brightness of the glow without affecting the performance of the tube at all. Finally, do not fall for the trap of thinking you must replace your tubes every year. If the sound is clear and your bias is stable, those tubes can last for thousands of hours. If you are dealing with mechanical issues elsewhere, like fixing a scratching noise in your turntable, remember that noise is often physical, while tube issues are almost always electronic. Trust your ears over your anxieties.
The Bookshelf and Toolbox Every Tube Owner Needs
To truly master the art of the vacuum tube, you need more than just a screwdriver. I always keep a copy of the RCA Receiving Tube Manual nearby; it is the ultimate technical reference for understanding the limits of your gear. Along with the manual, a dedicated bias probe is essential for anyone who wants to swap tubes safely without guessing. I also recommend a simple twenty-dollar upgrade for vintage decks like a high-quality anti-static mat, which keeps the environment clean for your sensitive electronics. I have seen enthusiasts turn a cheap thrift store speaker project into a giant-killer just by matching it with a well-maintained, properly biased tube amp. If you want to blend worlds, learning how to connect an old turntable to a modern digital soundbar can give you that analog vibe while utilizing modern convenience, but nothing beats the pure signal path of a dedicated tube setup.
#IMAGE_PLACEHOLDER_FINAL#
Your Journey Into the Warmth of Analog Sound
There is a specific kind of magic that happens when the sun goes down and the only light in the room is the soft orange and blue glow of your favorite amplifier. It connects us to the music in a way that clinical, cold digital files never quite can. Do not be afraid of the light show; embrace it as the heartbeat of your system. Once you know how to distinguish the healthy fluorescence from the dangerous gas, you can stop hovering over the power switch and start getting lost in the soundstage. Audio is meant to be a joy, not a chore. Does your amp have a subtle blue shimmer or a full-on neon light show? Let me know your tube setup and what colors you see in the comments below!