
I remember sitting on my living room floor, surrounded by a mountain of cardboard and $2,000 worth of “audiophile-grade” equipment. I’d spent all afternoon finding the sweet spot for my speakers in a rectangular room, convinced I was about to reach sonic nirvana. But when I finally hit play, the music didn’t just sound “off”—it sounded like it was coming from inside a hollow tin can. The bass had vanished, and the singer’s voice seemed to be floating somewhere behind my left ear instead of front and center. I was devastated. I started wondering if I’d been scammed or if my vintage speakers were losing their punch over time. It wasn’t until I crawled back behind the amp that I saw it: a single red wire shoved into a black terminal. I’d spent hours overthinking the acoustics when the culprit was a simple flip of a wire.
The Ghostly Sound of Phase Cancellation
If you’ve ever felt like your surround sound system sounds like it’s in mono or that your expensive towers have the low-end of a smartphone, you’re likely dealing with a phase issue. “Out of phase” is just a fancy way of saying your speakers are working against each other. When one speaker cone pushes out to create a sound wave, the other is pulling in. They are literally fighting to cancel each other’s sound out. It’s a common mistake, especially when you’re trying to match your car subs impedance to your amplifier or wiring up a complex home theater in a dark corner. According to the acoustics experts at Audioholics, phase cancellation is most destructive in the low frequencies, which explains why your bookshelf speakers need more power than you think but still sound thin if the wiring is off.
Will Wiring Speakers Backwards Actually Fry My Amp?
This is the number one fear I hear from my neighbors when I help them troubleshoot. The short answer is: No, you won’t blow anything up. You aren’t “shorting” the circuit; you’re just changing the timing of the vibration. It’s a purely acoustic problem, not an electrical one that causes smoke—though if you’ve ever smelled something funny, you might actually be looking at how to fix a car subwoofer that smells like it is burning instead. My mistake cost me a whole weekend of frustration, but I want to make sure yours only costs you 30 seconds. Have you ever felt like your speakers were “sucking” the air out of the room rather than filling it? Leave a comment below—I bet I’ve made that same mistake too. Today, I’m going to show you exactly how to spot this phantom problem and fix it without even touching a screwdriver.
Identify the Culprit with a Simple 9V Battery
To fix this, you need to think of your speakers as a pair of lungs. If one is breathing in while the other is breathing out, the air pressure in the room never changes, and your brain registers that as a lack of bass. The first and easiest way to verify your polarity is the battery test. Unplug your speaker wires from the back of your receiver. Take a standard 9V battery and briefly touch the positive wire to the positive terminal and the negative to the negative. If the speaker cone moves outward, you’ve identified the correct polarity. If it sucks inward, your wires are labeled or connected backward. I once spent an hour troubleshooting a high-end setup where the owner complained that their floorstanding speakers sound unbalanced in an l-shaped room. It wasn’t the room geometry at all; it was a single swapped wire at the terminal block that was cancelling out every bit of low-end energy. After a quick battery pop and a wire swap, the room finally felt alive again. 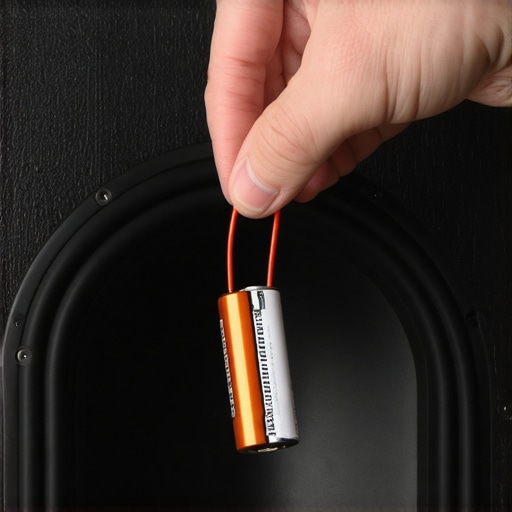
Stop Guessing and Watch the Cone Move
Visual confirmation is everything in audio. When you perform the battery test, you are looking for a uniform ‘thump’ forward. If you have a multi-driver setup, this also helps you ensure the crossover hasn’t been bypassed or miswired internally. If you notice the cone barely moves or makes a scratchy noise, it might be time to check how to clean green oxidization off your copper speaker terminals. That green crust acts like an insulator, preventing the clean flow of current and making even a correctly phased speaker sound weak and distorted.
The Secret to Consistent Wiring Across Long Runs
If you are running wires through walls or under carpets, it is incredibly easy to lose track of which strand is which. This is why I always tell people to choose the right gauge of wire for long outdoor speaker runs or indoor setups that use ‘ribbed’ or ‘marked’ insulation. Most speaker wire has a thin white stripe or a series of molded ridges on one side. Use that as your universal ‘positive.’ If you are mixing and matching gear, like trying to figure out how to wire a 4-ohm car speaker to an 8-ohm home receiver, consistency in your positive and negative leads is the only thing standing between you and a muddy soundstage.
Physical Stability for Better Phase Response
Phase isn’t just about the wires; it’s about the physical movement of the cabinet. If your speaker is wobbling even a fraction of a millimeter when the woofer kicks, you are losing timing accuracy. This is the reason your speaker stands need to be filled with sand. Adding mass ensures that 100% of the energy goes into moving the air, not the speaker itself. When both speakers are locked down and wired in perfect synchronization, that ‘hollow’ sound disappears, and the singer will finally snap back to the center of the room where they belong.While we are on the subject of power, there is a massive lie most manufacturers tell you: that more watts always equal better sound. In my two decades of tinkering, I’ve found that a high-quality 25-watt Class A amplifier will often run circles around a 100-watt budget receiver. It is not about the peak number on the box; it is about how much current the power supply can actually dump into the speaker when a bass drop happens. If you do not respect the electrical load, you will be left wondering how to tell if your amplifier has enough headroom for your speakers without clipping the signal into oblivion.
The Myth of High-Resolution File Dominance
We have been conditioned to believe that a higher bitrate automatically fixes a bad-sounding system, but that is a dangerous trap. I have seen enthusiasts spend thousands on lossless streaming subscriptions only to wonder why your speakers sound harsh when you play high-res files. The truth is, if your room acoustics or speaker phase are off, a high-res file just makes the flaws more obvious. A meta-analysis published in the Journal of the Audio Engineering Society by Dr. Joshua Reiss found that while listeners can sometimes distinguish high-res audio, the difference is statistically minute compared to the impact of the speakers themselves. 
Why Does Your High-End Gear Still Sound Like a Laptop?
If you have plugged a fancy new converter into your system and felt underwhelmed, you are not alone. It is a common frustration to find why your high-end DAC sounds exactly like your laptop’s headphone jack when the rest of your signal chain is the bottleneck. Often, the issue is not the digital processing but the physical interface. For example, something as simple as the reason your wireless earbuds sound different after changing the tips or why your headphones sound thin when you wear glasses comes down to the acoustic seal. If that seal is broken, no amount of ‘audiophile’ circuitry can bring back the lost sub-bass.
Avoid This Charging Trap with Your Portable Gear
Here is a specific ‘oops’ factor I see constantly: using high-wattage phone bricks for every device you own. You might think you are being efficient, but the truth about using a fast charger for your portable speaker is that the heat generated can cook the delicate internal lithium cells of cheaper units. This leads to a shortened lifespan and a battery that swells, eventually distorting the internal air volume of the speaker. It is these small, non-obvious mistakes that kill a great system faster than a blown tweeter. Have you ever fallen into this trap of overcomplicating your setup only to find the fix was something tiny? Let me know in the comments—I have definitely been there.
Once you have solved the phase issues and optimized your placement, the real work begins: keeping that performance from degrading. Most people treat their audio gear like a toaster—plug it in and forget it until it breaks. But high-end components are more like vintage cars; they require a specific maintenance schedule to keep the signal path pristine. I learned this the hard way when a $3,000 amplifier started sounding like a muddy mess because I ignored a tiny bit of buildup. If you want to keep your system sounding like day one, you need a dedicated kit of tools that go beyond a simple microfiber cloth.
Stop the Scratchy Noise with Professional Grade Cleaners
The biggest enemy of your sound quality isn’t age—it is oxidation. Every time you turn a knob or slide a fader, you are dealing with physical contact points that eventually corrode. I personally swear by DeoxIT D5. Unlike cheap generic cleaners, it doesn’t just wash away dust; it chemically improves the conductivity of the metal. I’ve used it to fix a scratchy volume dial with electrical contact cleaner on gear that was destined for the scrap heap. If you are a DJ or use a studio setup, knowing how to fix a scratchy volume fader on a professional mixer can save you hundreds in repair fees. It is also vital to periodically check your terminals, especially if you live in a humid climate, and learn how to clean green oxidization off your copper speaker terminals to ensure the current flows without resistance.
Turn Your Phone into a Professional Acoustic Analyzer
You don’t need a $500 calibrated microphone to understand your room’s flaws anymore. I use my smartphone as a diagnostic tool every time I swap out a piece of gear. By using apps like REW (Room EQ Wizard) or specialized mobile analyzers, you can learn how to use your phone to measure your rooms frequency response. This is how I discovered a massive 10dB dip at 80Hz in my own office that was sucking the life out of my kick drums. Seeing the data on a screen removes the guesswork. It tells you exactly where you need to add bass traps or move your seating position. 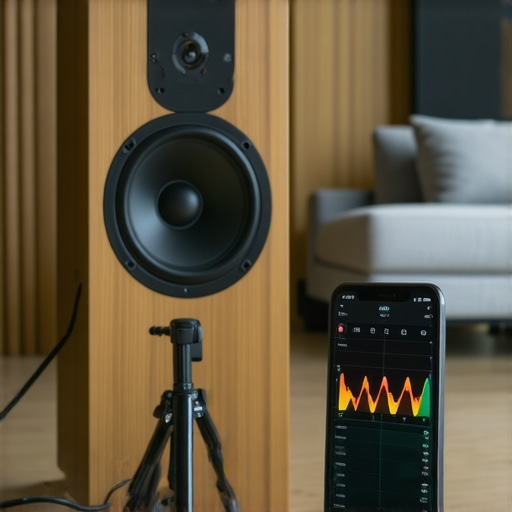
How do I maintain my home audio investment over time?
Maintenance is about being proactive rather than reactive. Every six months, I do a ‘walk-around’ of my system. I check the rubber around the woofers because they can get brittle or tacky; knowing how to clean sticky speaker surrounds without damaging the rubber is a skill that preserves the value of your towers. I also keep an eye on temperature. If you notice why your vintage amp gets hot even when you arent playing music, you might be dealing with a biased transistor that is slowly cooking itself. In the world of capacitors, they eventually dry out, so you should learn how to tell if your speakers capacitor is starting to fail before the crossover stops doing its job entirely. Even your software needs a check; if why your soundbar wont turn on with your TV remote anymore starts happening, it is usually a CEC handshake issue that a simple firmware reset can fix.
The Future of Home Audio is Intelligent Calibration
Looking ahead, the trend is moving away from manual tinkering and toward AI-driven room correction. Companies like Dirac and Trinnov are leading the charge, but even consumer-grade receivers are getting better at automatic EQ. According to technical documentation from the Audio Engineering Society (AES), digital signal processing (DSP) is becoming so advanced that it can compensate for poor room acoustics almost entirely. However, no software can fix a hardware failure. If you ignore the signs and why your receivers protection mode keeps triggering at high volume, you risk permanent damage. My advice? Get ahead of the curve. Go grab a 9V battery and check your speaker phase right now. If you have any questions about a weird noise your amp is making, drop a comment—I’ve likely heard it before. Before you do anything else, make sure you know how to spot a blown tweeter before it ruins your crossover; it’s the ultimate proactive save for any audiophile.
Hard Truths About Your Living Room Setup
After years of obsessing over technical specs, I realized that the room itself is the most influential “component” in your signal chain. You can buy the most expensive towers, but if you do not account for how they interact with your walls, they will never reach their potential. I used to think more money solved every problem, but often, a simple repositioning or a five-dollar wire fix does more for your clarity than a thousand-dollar upgrade. It is about harmony, not just raw power.
Another lesson learned? Don’t ignore the signs of stress in your electronics. If you find why your receivers protection mode keeps triggering at high volume, it isn’t just a minor annoyance; it is a desperate warning that you are pushing your hardware to its physical breaking point. Respecting the limits of your equipment is the only way to ensure it rewards you with decades of service rather than a puff of smoke.
The Only Tools You Actually Need for High-End Audio
You do not need a massive toolbox to keep your system in top shape, but a few specific items are essential for any serious listener. I always keep a can of DeoxIT D5 in my drawer—it is non-negotiable for anyone dealing with vintage gear where oxidation is the primary enemy of signal purity. I also keep a simple 9V battery specifically for checking polarity; it is the fastest diagnostic tool in existence for verifying phase. For the digital side, I rely on Room EQ Wizard (REW) to visualize the invisible acoustic peaks and valleys in my space, and I use high-density isolation pads to decouple speakers from furniture, which instantly tightens up the low-end.
Stop Tweaking and Start Listening
It is incredibly easy to get lost in the cycle of constant upgrades, always hunting for the next big score in home audio deals. However, the ultimate goal is to reach a point where the equipment disappears and only the music remains. Whether you are learning how to connect a modern phone to an old amp without a jack or hunting down a phantom rattle in a cabinet, remember that these technical fixes are just the path to the emotional experience of sound. Once you have verified your phase and cleaned your connections, give yourself permission to just enjoy the music.
Before you dive into your next playlist, make sure you know how to spot a blown tweeter before it ruins your crossover so you aren’t caught off guard by a sudden loss of detail. Have you ever spent an entire weekend troubleshooting your system only to find it was a single swapped wire or a loose plug? Let me know your most frustrating audio “oops” moment in the comments below!