
I’ll never forget the smell of that 1970s basement in suburban Ohio. It was a mix of mothballs, damp concrete, and the unmistakable scent of potential. There, tucked behind a stack of National Geographics, sat a pair of pristine-looking floorstanding speakers. I felt like I’d found buried treasure. I handed over a crisp hundred-dollar bill, hauled them home, and realized within ten seconds that I’d just bought two very expensive, very heavy paperweights. One woofer was frozen, and the crossover was toast. That day, I learned that ‘high-end’ doesn’t always mean ‘high-functioning’ when it’s been sitting in a humid cellar for two decades. [image placeholder]
The Golden Age of Hifi is Hiding in Someone’s Attic
For those of us who live for the warm glow of vacuum tubes and the weight of a real transformer, estate sales are the ultimate hunting ground. It’s the only place left where you can still find gear that would cost five figures today for the price of a decent dinner. But you have to know what you’re looking at. Unlike a climate-controlled shop, these items have often been neglected. I’ve seen beautiful amps that look perfect but hide dangerous secrets. For instance, you need to know how to tell if your speaker capacitors are starting to leak before you even think about plugging that vintage beast into a wall outlet. I’ve made every mistake in the book, from ignoring a vintage receiver that makes a loud hum to buying a unit without checking the back panel. Today, I’m pulling back the curtain on my personal ‘Estate Sale Protocol’ so you can walk away with the deal of a lifetime instead of a project that drains your bank account.
Isn’t Buying Used Electronics a Total Gamble?
It’s a fair question. You’re standing in a stranger’s living room, the sun is beating through the window, and there are ten other guys eyeing the same Marantz receiver. The pressure is real. According to data from the Statista Consumer Electronics Market, the demand for vintage and high-fidelity audio continues to climb, which means prices are high and competition is fierce. You might worry that you’re just buying someone else’s junk. But here is the secret: most estate sale companies don’t actually know the difference between a high-end DAC and a VCR. That knowledge gap is your profit margin. You just need to be prepared to walk away if things don’t look right, like if you notice your speaker is actually blown or just rattling. Have you ever felt that rush of finding a piece of gear you’ve dreamed of, only to hesitate because you weren’t sure if it was a scam or a steal? Tell me about your biggest ‘almost’ find in the comments below. Let’s get into the nitty-gritty of what to pack in your ‘hunting kit’ before the next Friday morning rolls around.
Survival Gear for the Serious Audio Scout
You cannot rely on a “tested” sticker at an estate sale. In my experience, “tested” usually means someone plugged it in and the lights turned on. To truly vet a piece of gear, you need a dedicated kit. This starts with a digital multimeter. Knowing how to use a multimeter to find a short in your speaker wires or a blown voice coil is the difference between buying a legend and buying a corpse. If you touch the probes to the speaker terminals and get a reading of zero or infinity, walk away. You’re looking for a steady reading, usually between 4 and 8 ohms. Next, bring a 3.5mm-to-RCA cable and a lightning or USB-C dongle. This allows you to bypass whatever crusty CD player is sitting there and use your own high-fidelity tracks. If you’ve optimized how to use your phone as a high-end audio source, you’ll have a consistent reference point to hear if the imaging is off or if the high-end is rolled off. 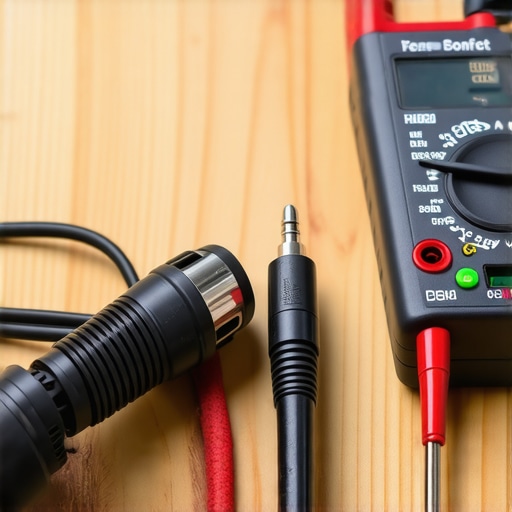
Don’t Trust Your Eyes Until You Touch the Gear
Visuals are deceptive. I once spotted a pair of Bowers & Wilkins speakers that looked museum-quality from five feet away. When I got closer and gently touched the silk dome tweeters, they were as brittle as dried leaves. Someone had clearly used a vacuum or canned air on them in the past, and I knew why you should never use compressed air to clean a silk dome tweeter—it destroys the delicate tension. Always inspect the “surrounds”—the rubber or foam ring around the woofer. If it crumbles like a cookie when you touch it, you’re looking at a re-foaming project. If the cabinets are sealed, any air leak will kill the bass response. I use the simple paper towel trick for finding speaker air leaks around the binding posts or the woofer seal. If you see that paper moving while the music is playing, the seal is shot.
Peek Inside Before You Pay
For amplifiers, I always give the volume knob a slow turn while it’s off. If it feels “crunchy” or gritty, that’s oxidation. Learning how to fix a scratchy volume knob on an old amp is a basic skill, but it’s also a great bargaining chip. I once knocked $100 off a Sansui receiver just because the seller thought the “static” meant the internal boards were failing, when I knew it just needed a shot of contact cleaner. If the seller allows it, peek through the top vents with a high-lumen flashlight. You are looking for “leaking” capacitors—they’ll look like they have a crusty, brown growth on top. If the amp powers on but sounds thin or biased to one side, you might have to deal with how to fix channel imbalance on a vintage stereo amplifier, which can range from a dirty switch to a failing transistor. On speakers, if the cone itself is slightly faded or stiff, you can sometimes save it. I’ve seen people give up on great gear when they could have simply learned how to revive a vintage speaker cone with simple rubber treatment to bring back that factory elasticity and snap.
Beyond the surface-level scratches, there is a myth that ‘mint condition’ equipment is a safer bet. I’ve found the often-frustrating opposite to be true. A receiver that has been used regularly for 40 years is frequently in better electrical shape than a ‘closet find’ that hasn’t seen current since the Reagan administration. Electrolytic capacitors are like muscles; they need regular exercise to stay ‘formed.’ When they sit idle, the internal chemistry degrades and the dielectric layer thins. According to research published by IEEE Spectrum and various component reliability studies, the typical lifespan of these components is significantly shortened by both extreme heat and total inactivity. This is why your vintage amp gets hot even when you aren’t playing music—it might be a sign that the internal bias has drifted dangerously far from factory spec due to component aging. If you buy a ‘pristine’ unit that has been sitting for decades, be prepared to factor in the cost of a professional re-cap before it becomes your daily driver. 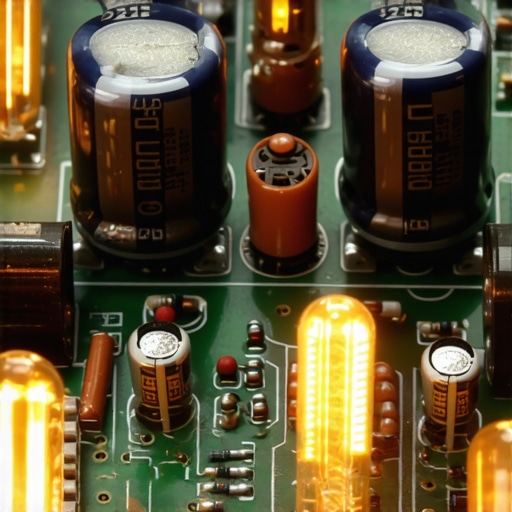
The One Accessory That Turns a Bargain Into a Brick
Here is the trap that catches even seasoned collectors: the missing remote. In the 90s and early 2000s, manufacturers like Denon, Onkyo, and Yamaha moved almost all critical setup functions—like speaker distance, crossover points, and individual channel levels—to on-screen menus that only the original remote can trigger. You might think you’re getting a steal on a flagship AVR for $40, but why you should never buy a used receiver without the remote becomes painfully clear when you realize you can’t even tell the unit you’ve added a subwoofer or change the input assignment. Replacing an original remote can cost $50 to $150 on the secondary market, instantly nuking your profit margin.
Does the Ohm Rating Really Matter for Vintage Amps?
If you are pairing modern speakers with an old find, you have to be incredibly careful. Many modern tower speakers dip down to 4 ohms or lower during complex musical passages. While a modern Class D amp handles this with ease, an older unit designed for a steady 8-ohm load might go into protection mode or literally melt its output transistors. Master the secret to choosing the right ohm rating for your amp before you pair that 1970s Silverface with modern power-hungry monitors. If you hook everything up and the soundstage feels ‘smeared’ or the bass is non-existent, don’t immediately assume the hardware is broken. You might just be dealing with a simple wiring error. I always recommend learning how to tell if your speakers are out of phase in 30 seconds before you start blaming the transistors. Finally, don’t fall for the ‘break-in’ excuse. While mechanical compliance changes slightly, the truth about speaker break-in periods is that the most significant shifts happen in the first few hours of use, not months. If a vintage speaker sounds ‘thin’ after an hour of play, it likely has a deeper crossover issue. Have you ever fallen into this trap of buying ‘perfect’ gear that turned out to be an internal mess? Let me know in the comments below.Once you’ve finally hauled that heavy wooden treasure home, the real work of preservation begins. I don’t care how clean the seller said it was; you need to perform a deep-clean before it joins your permanent rotation. My secret weapon is DeoxIT D5, but most people just spray it everywhere, which is a rookie mistake that can leave a sticky residue. You need to be surgical. Knowing how to fix a scratchy volume knob on an old amp isn’t just about clear sound—it’s about preventing the carbon track from wearing down permanently. If you have gold-plated terminals on a higher-end unit, stay away from harsh abrasives. I’ve seen people scrub the plating right off with steel wool. Instead, learn how to clean gold-plated connectors without ruining the finish using a lint-free swab and a dedicated contact enhancer like ProGold. I personally use a needle-tip applicator to apply the solution only where the metal meets metal. This level of precision is what separates a hobbyist from a restorer. 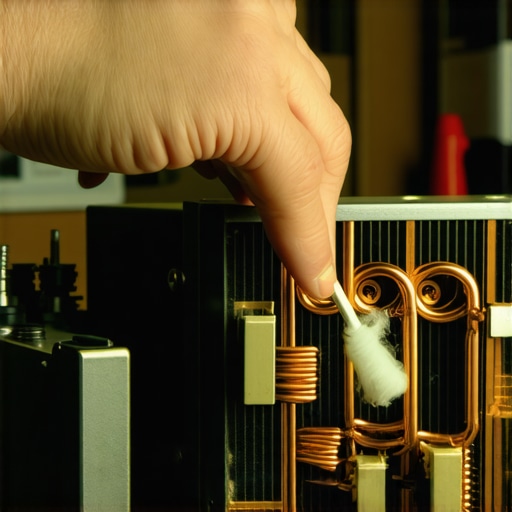
How do I maintain vintage audio gear over time?
Consistency is your best friend when it comes to longevity. Beyond the electronics, you have to consider the mechanical parts that modern gear simply doesn’t have. If you’ve picked up an old CD player, don’t assume the transport is dead if it skips on the first track. Often, it’s just a film of smoke or dust on the optics from decades of storage. I use a specific 99% isopropyl alcohol solution and a very steady hand to follow the steps on how to clean a laser lens on a skipping vintage cd player. It’s a five-minute fix that has saved many of my ‘broken’ thrift store finds. You also need to manage the electrical environment of your room. If you hear a low-frequency hum once everything is plugged in, you might be fighting a ground loop rather than a failing component. I recommend using a dedicated power conditioner and learning how to find the source of a ground loop in home theater setups before you start replacing expensive shielded cables. According to the Audio Engineering Society (AES) Technical Committee on Restoration and Archiving, the biggest threat to these machines is oxidation and the breakdown of rubber-based drive belts and idler wheels. I predict we are entering a ‘New Golden Age’ where we will see a surge in 3D-printed replacement parts and open-source PCB designs for ‘classic’ circuits, making these 40-year-old amps practically immortal for the next generation. As high-res streaming becomes the standard, knowing the best way to organize a massive digital music library is just as vital as knowing how to bias a tube. My challenge to you: pick one piece of gear you’ve neglected, open it up, and give those RCA jacks a proper cleaning tonight. You’ll be shocked at how much ‘veiling’ disappears from the sound just by removing a microscopic layer of decades-old crud.
What My Most Expensive Mistakes Taught Me About Vintage Gear
Over the years, I’ve realized that the best gear often hides under a layer of dust that scares off casual buyers. First, always trust your nose before your wallet; if an amplifier has a sweet, ozone-like scent when powered on, it is likely cooking its own components. Second, look for the ‘unwanted’ heavy hitters. While everyone fights over a Marantz, a heavy, nondescript Japanese powerhouse from the late 80s often offers better specs for a fraction of the cost. Third, do not be afraid of cosmetic damage. You can easily learn how to revive old speakers with new foam surrounds or use the simple way to fix a rattling metal speaker grill to make a twenty-dollar find look like five hundred again. These small repairs are where the true profit and satisfaction lie.
The Audio Hunter’s Essential Survival Kit
Before you hit the next Saturday morning sale, make sure your trunk isn’t just empty—it needs to be prepared. I never leave home without a small bottle of contact cleaner. If you encounter a mixer with stiff controls, knowing how to fix a scratchy fader on a vintage audio mixer right there on the driveway can help you negotiate a lower price. I also keep a thick moving blanket or a small carpet remnant in my car. Not only does it protect the gear during transport, but you can also use it to dampen a harsh testing environment, much like why you should use a rug to fix a bright sounding room at home. Finally, keep a bookmark for the ‘HiFi Engine’ database on your phone; it is the ultimate ‘cheat sheet’ for checking original MSRP and technical specifications in the heat of the moment. #IMAGE_PLACEHOLDER_E#
Bring the Soul Back to Your Listening Room
The journey from a dusty garage to your dedicated listening space is one of the most rewarding parts of this hobby. There is a profound sense of stewardship in taking a piece of high-fidelity audio history and giving it a second life. Don’t be intimidated by a little bit of grime or a missing cable. With the right approach and a bit of patience, you aren’t just buying electronics; you are preserving the craftsmanship of a bygone era. Go out there, trust your gut, and start building the system of your dreams one estate sale at a time. Have you ever walked away from a deal only to regret it for years, or did you find your ‘holy grail’ for pennies on the dollar? Tell me your best story in the comments below!