
I was listening to my favorite jazz record last night—a pristine pressing I’d just cleaned—when a sudden, metallic buzz ruined the mood. It wasn’t the vinyl. It was the grill on my right floorstander vibrating in sympathy with the double bass. It’s a heartbreaking sound for any audiophile because you spend thousands on gear, only for a five-cent piece of vibrating plastic or metal to ruin the soundstage. I’ll admit, years ago I made the rookie mistake of reaching for the superglue, which resulted in a permanent white stain on a beautiful walnut cabinet. I learned the hard way that liquid adhesives and speakers don’t mix. Today, I am going to show you how to silence that irritating vibration using simple mechanical tension and hidden dampening techniques that keep your equipment pristine.
That Buzzing Sound is Driving Us Both Crazy
If you’ve noticed your floorstanding speakers sound boomy or produce a strange resonance during low-frequency notes, the culprit is often the grill frame losing its tight grip against the cabinet. This usually happens as temperature shifts cause the materials to expand and contract over time. I once spent two days chasing a phantom distortion only to realize it was a loose terminal, and fixing a loose speaker terminal taught me that the smallest mechanical gaps make the most intrusive noise. We aren’t just looking for a way to stick things together; we are looking to decouple the vibrating parts. Have you ever had to sit across the room and glare at your speaker because of a mystery rattle?
Won’t This Fix Just Look Like a Cheap Hack?
I understand the skepticism. You don’t want your beautiful setup looking like a middle-school science project held together by duct tape. The beauty of these non-glue methods is that they are entirely invisible and reversible. Whether you are dealing with a classic home setup or trying to stop your car trunk from rattling, the physics remain the same: you need to fill the gap with a material that absorbs energy rather than transferring it. According to the Audio Engineering Society, even minor mechanical resonances can introduce measurable harmonic distortion into the listening environment, masking the fine details of your music. By using the simple way to fix a rattling metal speaker grill, you are not just stopping a noise; you are restoring the integrity of the sound as the artist intended. [image]
Find the Harmonic Culprit First
To fix a rattle, you first have to catch it in the act. Think of your speaker cabinet like a high-performance engine; even a loose bolt can create a cacophony that masks the precision of the machinery. You need to play a frequency sweep or a track with isolated, heavy bass. I usually go for a deep synth-wave track because those sustained low notes are perfect for triggering mechanical resonances. While the music is playing, walk up to your speakers and apply light pressure with your finger to different parts of the grill. If the buzzing stops the moment you touch a specific corner, you’ve found your gap. It’s a similar process to determining why your floorstanding speakers need more breathing room from the wall—you are looking for the physical interaction between the speaker and its environment.
The Simple Touch Test
I remember a time I was helping a friend with his vintage setup. We thought a driver was blown because every time the kick drum hit, there was a nasty ‘clack.’ We almost ordered replacement parts before I realized the plastic peg on the grill wasn’t seated quite right. Just like knowing how to stop your cars rear deck from rattling when the sub hits, the solution wasn’t a new speaker; it was a tiny piece of dampening material. If the grill moves even a fraction of a millimeter when you push on it, that’s where your energy is being wasted.
Why Felt is the Hero of Your High-End Setup
Once you’ve identified the loose spot, your best tool isn’t a screwdriver—it’s self-adhesive felt or thin craft foam. This is the ultimate ‘decoupler.’ In the world of high-end audio, decoupling is the art of ensuring that two surfaces don’t vibrate against each other. This is the trick to making cheap bookshelf speakers sound expensive because it cleans up the ‘mud’ caused by secondary vibrations. Take a strip of thin, 1mm adhesive felt and cut it into tiny squares or thin lines. You want to apply these to the inner frame of the grill, specifically where it meets the wood or plastic of the speaker face. 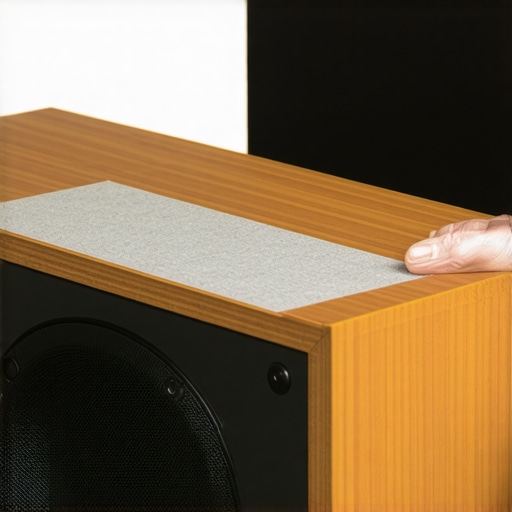
Apply the Secret Foam Gasket Trick
If your grill uses pegs and grommets, the rattle is often inside the hole itself. I’ve seen people try to wrap the pegs in tape, but that eventually gets gummy and stuck. Instead, take a tiny piece of foam and push it into the grommet hole before inserting the grill peg. This creates constant outward pressure, essentially ‘pre-loading’ the joint so it can’t wiggle. It’s the same logic used when you’re trying to fix a loose speaker terminal on your cabinet—mechanical stability is the enemy of unwanted noise.
Give Metal Grills a Physical Memory
Metal grills are a different beast because they can actually warp over time. Unlike cloth-covered wood frames, a metal mesh can develop a ‘bow’ that makes it slap against the cabinet. To fix this, you need to use the simple way to fix a rattling metal speaker grill by gently bending the mesh. By introducing a slight inward curve, you ensure that the edges are always under tension against the speaker frame. This tension prevents the metal from reaching its own resonant frequency. Remember that even a bluetooth speaker sounds better on a wooden table because of how materials absorb or reflect energy. By adding felt or adjusting tension, you are essentially tuning the ‘instrument’ that is your speaker cabinet. Even if you think your gear is fully broken in, much like why your new speakers sound better after 20 hours of use, these small mechanical adjustments are what finally bring the soundstage into focus.It’s easy to get caught up in the ‘magic’ of audio, but once you’ve silenced the physical rattles of your grill, you have to face the deeper nuances of system noise. A common myth I see on forums is that you need five-figure interconnects to get rid of background noise or ‘improve’ the clarity of your highs. The reality? Most of the time, that annoying static or hum is just a simple ground loop caused by poorly designed power chains. If you’re hearing a low-frequency drone that fluctuates when you touch your gear, knowing how to find the source of a ground loop in home theater systems will save you more money than any silver-plated cable ever could. We often mistake these electrical gremlins for mechanical failures. For example, understanding why your vintage receiver makes a loud hum with no music playing often reveals drying capacitors rather than a ‘blown’ driver.
Why Does My High-End Amp Click When I Adjust the Volume?
This is a question that frequently scares newcomers to the hobby. They buy a premium piece of gear, turn the knob, and hear a physical ‘click’ coming from inside the chassis. Many assume it’s a short circuit or a failing part. In reality, it’s usually a sign of superior engineering. Higher-end amplifiers often use discrete relays to switch between resistor ladders, ensuring perfectly matched channel balance at every volume level. Understanding why your receiver clicks when you change the volume helps you appreciate the mechanical precision involved. According to research published by the Journal of the Audio Engineering Society, listener fatigue is significantly reduced when channel balance is maintained within tight tolerances—something only these mechanical ‘clicking’ relay systems can reliably achieve in the analog domain. 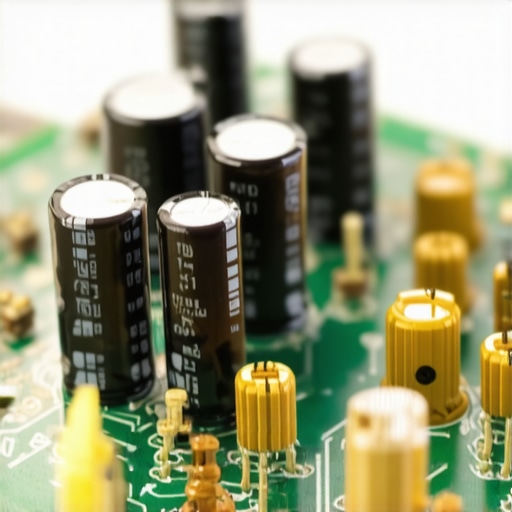
Don’t Kill Your Tweeters with This Common Cleaning Mistake
While we’re on the subject of high-end maintenance, there is a specific ‘Oops’ factor that breaks my heart every time I see it: the canned air trap. You see a bit of dust on that delicate silk dome and think a quick blast of air will clear it off safely. Stop immediately. You should never use compressed air to clean a silk dome tweeter because the concentrated pressure can permanently deform the voice coil or even tear the fragile fabric. Many enthusiasts obsess over the truth about speaker break-in periods, waiting dozens of hours for the sound to ‘open up,’ only to accidentally ruin the high-frequency response in five seconds with a can of Dust-Off. If you must clean them, use a very soft, dry artist’s brush or a light puff of breath—never a mechanical air source.
The Secret Logic of Room Interaction
Finally, stop blaming your gear for every sonic flaw. I’ve seen people replace $2,000 speakers because they sounded ‘thin’ or ‘harsh,’ when the actual culprit was the lack of soft surfaces in their minimalist living room. The room is the final component in your signal chain. A speaker that sounds perfect in a treated studio can sound like a tin can in a room with hardwood floors and glass walls. This is why I always suggest starting with basic acoustic treatment before reaching for your credit card. Have you ever fallen into this trap or accidentally damaged your gear while trying to ‘improve’ it? Let me know in the comments.Once you’ve wrestled with room acoustics, the focus shifts to the literal physical health of your equipment. I’ve seen enthusiasts spend weeks debating the merits of different speaker brands, only to let a perfectly good amplifier rot because of a bit of dust and moisture. I personally keep a maintenance kit that consists of three specific items: high-purity contact cleaner, a digital multimeter, and a soft-bristled artist’s brush. Oxidation is the silent killer of high-fidelity sound. It creeps onto your terminals and creates a layer of resistance that eats away at your micro-dynamics. Knowing how to clean gold-plated connectors without ruining the finish is step one for any serious listener. I recommend using DeoxIT D5; unlike generic hardware store cleaners, it contains a deoxidizer that specifically targets metal oxides without damaging the surrounding plastics.
How do I maintain my home audio gear over several decades?
The key to longevity is consistency. You don’t need to perform an overhaul every month, but an annual health check is vital. For your speakers, check the surrounds. If you’re running older gear, you should know how to revive a vintage speaker cone with simple rubber treatment before the material becomes brittle and cracks. If you’re a headphone user, don’t ignore the ergonomics. Check the 7 signs your headphone pads need replacing today, because compressed pads don’t just feel bad—they change the distance between the driver and your ear, which completely ruins the frequency response intended by the designer. According to the service documentation for the legendary McIntosh MC275 tube amplifier, ensuring clean contact points is the single most effective way to prevent thermal runaway and circuit failure in high-voltage audio environments. 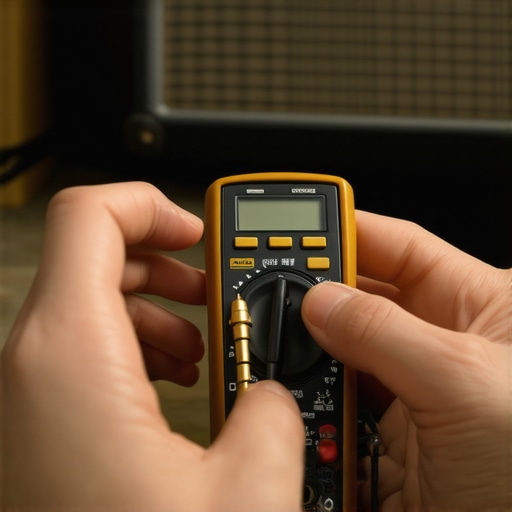
Why a Multimeter is Better Than a New Set of Cables
If you find yourself constantly upgrading cables because you think you have a bad wire, stop spending money and start measuring. I use a basic digital multimeter to check the continuity of every cable in my chain twice a year. It is the only way to definitely know if you have a hairline fracture in your copper. Learning how to use a multimeter to find a short in your speaker wires will save you hundreds of dollars in unnecessary replacements. While you’re at it, peek inside your older amps. You need to know how to tell if your speaker capacitors are starting to leak, especially if you notice a bulging top or a crusty residue around the base of the component. If the volume knob feels gritty, don’t force it; learn to fix a scratchy fader on a vintage audio mixer or receiver with a quick blast of fader-lube. Looking ahead, I predict a significant shift back toward modularity. As consumers grow tired of disposable tech, high-end audio brands are going to start emphasizing repairability as a luxury feature. We are already seeing boutique brands provide schematics and replacement parts directly to users. My challenge to you? Grab a bottle of contact cleaner today and wipe down every RCA and speaker connection in your system. You might be surprised at how much air and detail you were missing simply due to a microscopic layer of grime.
Hard Truths I Learned After Years of Chasing the Perfect Sound
I used to think that a speaker grill rattle meant the driver was failing. I wasted hundreds on replacements before realizing that a simple 50-cent piece of foam could have fixed it. Here are a few lightbulb moments from my years in the hobby:
- Vibrations are the enemy, not the gear. Often, floorstanding speakers sound boomy because of their environment, not their quality. Don’t throw away good hardware when a little physical isolation is all you need.
- Maintenance is a form of tuning. You don’t just clean a receiver for looks; cleaning gold-plated connectors actually lowers resistance and brings back the micro-dynamics you thought were gone.
- Trust the process of aging. We often rush to judge new equipment, but the truth about speaker break-in periods is that the mechanical components really do need time to reach their optimal flexibility.
- Room treatment beats a new DAC every time. If your speakers sound harsh, before you swap your cables, use a rug to fix a bright sounding room. It’s the cheapest upgrade you’ll ever make.
The Tools I Trust to Keep My Gear Singing
You don’t need a professional workshop, but a few specific items will save you from constant frustration. First, stop guessing if a wire is broken and learn how to use a multimeter to find a short. It’s an absolute lifesaver for diagnosing intermittent signal drops. Second, keep a bottle of high-purity contact cleaner handy for any vintage gear; it’s the gold standard for restoring connectivity without damage. Third, if you have old analog equipment, knowing how to fix a scratchy fader with proper contact lubricant will make your volume adjustments feel like silk again. Finally, I always keep some adhesive felt pads on hand—the same ones used for the simple way to fix a rattling metal speaker grill—because there is always a new resonance waiting to be silenced.
Reclaim the Music from the Noise
The journey to high-fidelity sound isn’t just about what you buy; it’s about how you care for what you have. Whether you are dealing with a vintage receiver that makes a loud hum or a modern setup that just needs a bit of mechanical damping, these small fixes are what separate a frustrated listener from an audiophile in bliss. Don’t be afraid to get hands-on with your equipment. You now have the techniques to identify, isolate, and eliminate the distractions that stand between you and the artist’s intent. Silence the rattles, clean the contacts, and let your speakers perform at their peak. Have you ever spent hours chasing a mystery rattle only to find it was something tiny? Let me know your most frustrating (or satisfying) fix in the comments below!