
I was staring at the back of this gorgeous Marantz I’d just scored—one of those lucky finds you only get if you know the trick to buying high-end audio at estate sales. It had the warm wood grain, the glowing blue lights, and that classic analog soul. But as I went to hook up my modern powered subwoofer, my heart sank. No RCA sub-out. Nothing. Just those old-school spring clips for the main speakers. I felt like I’d bought a vintage Ferrari only to realize it didn’t take modern gasoline. It’s a frustrating moment that makes most people think they have to choose between vintage charm and modern bass. I’m here to tell you that you don’t have to choose. You can have both. Today, we are going to bridge that gap and get your system thumping without needing a single dedicated subwoofer port. Have you ever stood behind your gear with a handful of cables and absolutely no clue where they’re supposed to go? You aren’t alone.
Don’t Give Up on That Vintage Gear Just Yet
Early in my audio journey, I made the classic rookie mistake of trying to ‘hack’ an output by stripping a cheap RCA cable and jamming the raw copper into the speaker terminals. It was a disaster. Not only did it sound like a muddy mess, but I nearly fried the output transistors on a perfectly good amp. If you’ve ever dealt with a situation where your vintage receiver makes a loud hum, you know the panic that set in. The good news is that your sub likely already has the solution built-in; we just need to use ‘High-Level Inputs.’ This method actually carries the same sonic ‘fingerprint’ as your main speakers, which many audiophiles argue creates a more cohesive soundstage than a dedicated sub-out ever could. By the time we’re done, you’ll know exactly how to set up a 2.1 system that sounds like it was engineered to be together from the start.
Will This Wiring Hack Actually Ruin My Sound?
It’s a valid fear. Most people think that ‘tapping into’ the speaker wires will steal power from the main speakers or cause some kind of impedance nightmare. However, according to the engineering experts at Sound & Vision, a subwoofer’s high-level input has very high impedance, meaning it ‘sniffs’ the signal without actually drawing any significant power from your receiver. You aren’t stressing the amp; you’re just giving the sub a map to follow. The real danger isn’t the wiring method itself, but rather the mistake you’re making when positioning your subwoofer or failing to match the phase properly. We’re going to walk through the process of using speaker wire to connect your sub directly to the same terminals as your bookshelf or floorstanding speakers, ensuring a rock-solid connection that won’t leave your gear smoking on the floor. Ready to get those floors vibrating?
Run Your Wires in Parallel for the Easiest Setup
The most reliable way to bring a subwoofer into a vintage setup is by using ‘High-Level’ or ‘Speaker-Level’ inputs. Think of this like a plumber adding a T-junction to a pipe; the main flow keeps going to your speakers, but you’re siphoning off a tiny bit of pressure to tell the subwoofer what’s happening. You aren’t actually drawing power from the amp to drive the sub’s big woofer—the subwoofer’s internal amplifier does all the heavy lifting. This is why you don’t need to worry about the secret to choosing the right ohm rating for your amp when using high-level inputs. The sub’s input impedance is so high it’s practically invisible to your receiver. I remember trying this for the first time with a pair of beat-up bookshelf speakers I found at Goodwill. I spent an afternoon learning how we made a 20-dollar thrift store speaker sound like a pro monitor, and the final piece of the puzzle was tapping into the speaker terminals to feed a powered sub. The result wasn’t just ‘louder’—it felt like the music finally had a foundation to stand on.
Use Speaker B Terminals if Your Amp Has Them
If your vintage receiver has ‘Speaker A’ and ‘Speaker B’ switches on the front, you’ve hit the jackpot. This is the cleanest way to wire things up. Connect your main left and right speakers to the ‘A’ terminals as usual. Then, run a second set of speaker wires from the ‘B’ terminals directly to the high-level inputs on the back of your subwoofer. When you want bass, you just make sure both the A and B buttons are pressed in. This keeps the back of your receiver from becoming a tangled nest of copper and helps prevent accidental shorts. If you’re worried about a messy install, it’s always a good idea to how to use a multimeter to find a short in your speaker wires before you flip the power switch for the first time.#IMAGE_PLACE_HOLDER_B#
Double Up on Speaker A Terminals
If you only have one set of speaker outputs, don’t panic. You can simply ‘piggyback’ the wires. Twist the end of the wire going to your left speaker together with the end of the wire going to the subwoofer’s left input, and jam them both into the same terminal on the receiver. It’s essentially the same logic used when you how to connect four speakers to a two channel amplifier safely. Just be extremely careful that no stray copper strands touch the chassis or the neighboring terminal, as vintage gear rarely has the sophisticated protection circuits found in modern amps.
Dial in the Crossover to Stop the Mud
Once everything is wired, the biggest mistake people make is letting the sub and the speakers fight over the same frequencies. This results in ‘one-note bass’ that sounds boomy and indistinct. Since your vintage receiver isn’t doing any digital processing, you have to use the ‘Crossover’ or ‘Low Pass’ knob on the back of the sub itself. A good rule of thumb is to look at the best crossover frequency for small satellite home theater speakers and start there—usually around 80Hz. If your main speakers are large floorstanders, you might drop that dial even lower to 50Hz or 60Hz. The goal is for the sub to take over exactly where the main speakers start to give up. Finally, don’t forget to how to match your subwoofer phase with your main speakers. If the sub is pushing out while your speakers are pulling in, they will cancel each other out, leaving you with less bass than when you started.While the parallel wiring method we discussed is a game-changer, there’s a sophisticated nuance that most enthusiasts ignore: the sonic signature of the amplifier itself. Many people argue that a digital connection is ‘cleaner,’ but in my experience, using high-level inputs is the only way to preserve the lush, harmonic distortion that makes vintage gear sound so alive. If you’ve spent hours trying to figure out how to fix channel imbalance on a vintage stereo amplifier, you don’t want to lose that hard-earned character by introducing a sterile, digital signal path for your low end. The biggest mistake you can make right now is assuming your brand-new sub is ready to rock straight out of the box. I used to think ‘break-in’ was just audiophile superstition, but the truth about speaker break-in periods is that the physical suspension of a new driver needs time to reach its intended flexibility. If you tune your system on day one, you’ll be retuning it again in two weeks. Also, keep an eye on your ground path; if you start hearing a buzz, you need to know how to get rid of ground loop hum in your audio setup immediately before you blame the vintage electronics.
Why Does My Bass Disappear When I Move to the Couch?
This is the ‘node’ problem. You can have the perfect wiring and the most expensive gear, but if your seating position is in a null point, the sound waves cancel each other out. Dr. Floyd Toole, a pioneer in acoustics research at Harman, famously demonstrated that multiple subwoofers are almost always superior to a single large one for achieving a ‘smooth’ bass response across a room. This is why you might actually want to learn how to wire two subwoofers to a single mono amp. It’s not about volume; it’s about filling the holes in the air. #IMAGE_PLACE_HOLDER_C# This approach allows you to combat room modes that a single 15-inch driver simply cannot overcome, regardless of how much power you throw at it. Have you ever fallen into this trap where your system sounds great in the corner but thin at your seat? Let me know in the comments.Maintaining a hybrid system where vintage warmth meets modern punch requires more than just a quick wipe with a microfiber cloth. When you are pushing an older receiver to drive both speakers and a siphoned subwoofer signal, heat becomes your primary enemy. I’ve seen beautiful brushed-aluminum faceplates ruined because owners tucked their gear into tight cabinets without airflow. If you want that Marantz or Pioneer to last another three decades, you need to be proactive about internal cleanliness. I personally use a can of compressed air every six months, but never on the delicate parts; instead, I focus on the heat sinks and the transformer. If you start hearing a crackle when adjusting the output, you must learn how to fix a scratchy volume knob on an old amp before the oxidation causes permanent damage to the resistive track. This isn’t just about aesthetics; it’s about signal integrity. Dirty contacts introduce resistance, and resistance is the killer of low-end clarity.
How do I keep this vintage setup running for another thirty years?
The secret lies in the electrolytic capacitors. These tiny components are the ‘batteries’ of your amplifier’s power supply, and they have a shelf life. According to the technical specifications from Nichicon, a leading manufacturer in the audio space, capacitors are rated for specific hours of use at peak temperatures, often failing after 20 to 30 years. You should regularly check for bulging or leaking fluid by looking inside the chassis; knowing how to tell if your speaker capacitors are starting to leak can save your entire output stage from a catastrophic short. Additionally, don’t ignore the physical condition of your drivers. If your sub is working harder to compensate for aged bookshelf speakers, check the rubber or foam around the cones. If they feel brittle, it’s time to learn how to revive old speakers with new foam surrounds to restore that lost excursion. 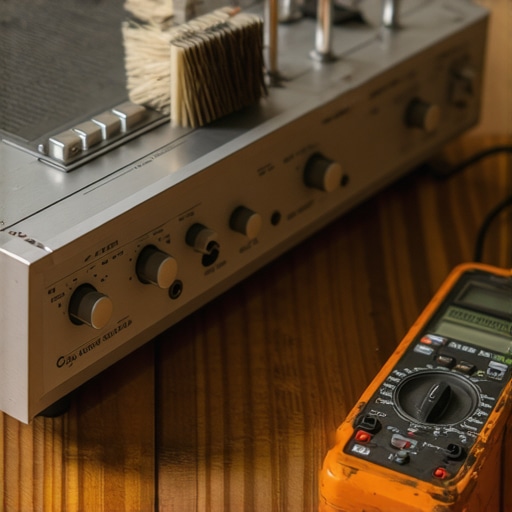 Beyond the internals, your physical connections are the most vulnerable point for signal degradation. Oxygen is constantly working against you, creating a thin layer of non-conductive film on your wires. I make it a habit to unplug and replug everything once a year just to ‘wipe’ the contacts clean. For those high-end silver or gold connections, you need to be even more careful; learn how to clean gold-plated connectors without ruining the finish to keep the conductivity at 100%. Looking ahead, I predict we will see a massive surge in ‘Smart Analog’ interfaces—devices that use AI-driven DSP to analyze the specific harmonic distortion of vintage circuits and perfectly time-align modern subwoofers in real-time. We are already seeing the early stages of this with room correction software, but the next step is deep integration. My advanced tip for you today: buy a basic digital multimeter. It is the only way to truly verify that your wiring hasn’t developed a high-resistance bridge that is slowly cooking your transformer. Go grab one and test your speaker lines tonight; you might be surprised by what you find.
Lessons I Learned While Shaking My Own Foundations
After years of tinkering, I’ve realized that the most expensive cable in the world won’t save a poorly tuned system. One lightbulb moment for me was realizing that the trick to making cheap bookshelf speakers sound expensive isn’t just about the sub—it’s about the balance between the two. I also learned the hard way that if your main speakers are struggling, you might need to look at more than just the wiring; sometimes learning how to revive a vintage speaker cone with simple rubber treatment is the key to restoring that lost punch before the sub even kicks in.
The biggest ‘insider’ tip I can give you? Trust your ears more than the dials. If the math says 80Hz but your room says 60Hz, listen to the room. Bass is physical, and every living room responds differently to those low frequencies. If you find yourself needing even more control, you might eventually want to investigate why two small subwoofers are better than one massive driver for creating a truly immersive environment without the ‘boomy’ dead zones.
My Go-To Gear for Taming Low-End Chaos
If you’re serious about this, don’t just wing it. My toolkit always includes a reliable multimeter to check for those hidden shorts. I also swear by a bottle of DeoxIT D5 for cleaning every connection—it’s essentially magic for vintage gear. Once you have the wires run, you’ll likely face the challenge of aesthetics; I found that knowing how to hide audio cables in a room with concrete walls saved my marriage and my living room’s look. Lastly, keep a few ‘reference’ tracks handy—songs you know by heart—to use as your benchmark for every adjustment you make.
Stop Reading and Start Listening
There is a special kind of magic that happens when a vintage receiver from the 1970s meets the raw power of a modern subwoofer. It’s a bridge between eras that results in a sound that is both soulful and physically moving. Don’t let the fear of ‘doing it wrong’ stop you from experimenting. These machines were built to be played, not just looked at. Get those wires connected, dial in your crossover, and give your music the foundation it deserves. Have you ever struggled with getting the bass to sound ‘tight’ rather than ‘boomy’ in your specific room? Let me know in the comments below!