
I remember sitting in my living room at 2 AM, trying to sneak in a movie without waking the kids. Every time I hit the volume down button on the remote, my receiver let out this sharp, mechanical click. It sounded like a tiny stapler was living inside my home theater setup. I panicked. I thought for sure I was about to see a puff of smoke. But as I’ve learned over twenty years of tinkering with home audio, that sound is often a sign of quality, not a cry for help. Have you ever felt that sudden spike of anxiety when your expensive gear makes a noise it shouldn’t make? Drop a comment if you’ve ever rushed to pull the power plug because of a weird noise.
Relays are the Unsung Heroes of Clean Sound
When I first started building my system, I made the huge mistake of returning a high-end integrated amplifier because I thought the clicking was a defect. I felt like a total amateur when the shop owner explained that I was actually hearing physical relays switching. Unlike cheap digital chips that can degrade your audio, many premium receivers use relay-based volume controls or stepped attenuators to keep the signal path as pure as possible. This is especially common when you are trying to fix a scratchy volume knob on an old amp or when using modern gear that tries to emulate that vintage precision. According to the engineering team at Cambridge Audio, mechanical relays are often used in high-fidelity equipment to prevent the distortion typically introduced by solid-state volume integrated circuits. If you’ve ever noticed why your vintage receiver makes a loud hum with no music playing, you know that electrical components can be finicky, but these clicks are usually intentional mechanical movements.
Is that clicking sound actually damaging my speakers?
The short answer is no. In fact, those relays are often there to protect your equipment. Think of them as tiny, lightning-fast light switches that ensure the right amount of power is heading to your drivers. If you are trying to connect four speakers to a two-channel amplifier safely, your receiver’s internal protection relays might click even more frequently to prevent an impedance mismatch. It’s a bit like the sound of a deadbolt sliding into place; it’s loud, but it’s the sound of security. We are going to dive into why some receivers do this while others are silent, and when you should actually worry.
Listen for the Rhythm of the Relay
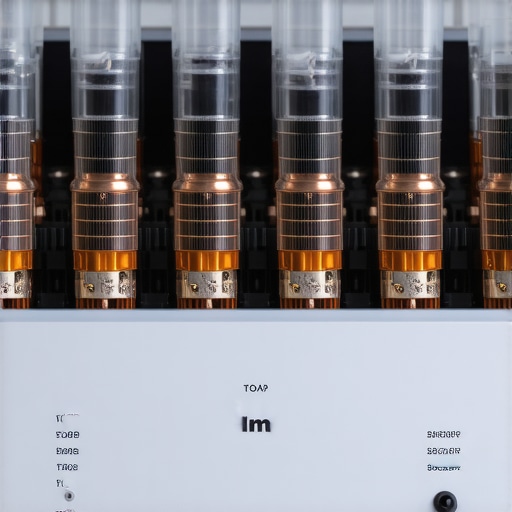
To understand why your gear is making noise, you need to pay attention to when the sound occurs. If the click happens exactly when you turn the volume knob or press the volume buttons, you are likely hearing a stepped attenuator or a relay-based resistor ladder. These are high-end design choices meant to ensure that the left and right channels stay perfectly balanced. Many older units suffer from channel tracking issues where one speaker is louder than the other at low volumes. To combat this, manufacturers use these mechanical switches to maintain a pure signal. If you find your audio balance is off even with the clicking, you might need to learn how to fix channel imbalance on a vintage stereo amplifier before blaming the relays themselves.
Spotting the Difference Between Protection and Precision
Not all clicks are created equal. A volume relay click is light, rhythmic, and predictable. However, if your receiver lets out a loud, heavy thunk followed by the audio cutting out entirely, you’ve entered ‘Protection Mode.’ This is your receiver’s way of committing a digital ‘tackle’ to stop electrical surges from frying your speakers. I once spent a frantic Saturday afternoon where my flagship receiver kept clicking every time the bass hit. I was convinced the internal power supply was toast. I had already started looking up repair shops until I decided to actually check the back of the unit. Turns out, one stray strand of copper was touching the chassis. Learning how to fix a loose speaker terminal on your cabinet and cleaning up my wiring saved me from a $200 diagnostic fee. If the clicking is random and not tied to your volume adjustments, it’s time to grab a tool and learn how to use a multimeter to find a short in your speaker wires.
Trace the Click Before You Open the Case
Before you assume your hardware is failing, perform a simple isolation test. Unplug all your speakers and input sources, then turn the volume up and down. If it still clicks, the sound is definitely the internal relays doing their job. This is common in gear that hasn’t even finished its truth about speaker break-in periods yet. If the clicking stops when the speakers are disconnected, the issue is external—likely an impedance dip or a short in the line. You should also keep an eye on your internal components; if the clicking is accompanied by a lack of power or a hum, you might need to check how to tell if your speaker capacitors are starting to leak, as failing caps can cause relays to trigger inconsistently. Relays are the messengers; they aren’t usually the problem, but they are the first ones to tell you when something else is wrong.
Maintenance Without the Headache
If the clicking sounds ‘sticky’ or happens with a delay, it might be dust. While you should never use compressed air to clean a silk dome tweeter, a quick blast of specialized electronic contact cleaner inside the chassis (with the power off!) can sometimes quiet down a noisy relay. Just like why your new speakers sound better after 20 hours of use, mechanical parts in your receiver sometimes need a bit of a ‘workout’ to keep the contacts clean. If you haven’t used your receiver in months, simply rotating the volume knob through its full range several times can help clear off oxidation that causes the relays to chatter.
One of the biggest lies I fell for early on was the idea that every piece of ‘pro’ gear needed a ‘pro’ price tag to match. Specifically, when it comes to digital signals, the marketing departments of high-end cable companies deserve an Oscar for their performance. They will tell you that a $200 Toslink cable will make your strings ‘airier,’ but here is the cold, hard truth: it is a digital signal. It is ones and zeros. You should stop wasting money on expensive optical cables because, unlike analog signals, light pulses do not care about ‘oxygen-free copper’ or fancy braiding. If the light gets from point A to point B, the data is identical.
Ditch the Boutique Cables and Fix Your Room Instead
Where you should be spending that money is on your room’s physics. I have seen enthusiasts drop five figures on floorstanding speakers only to shove them into a corner and wonder why they sound muddy. In reality, why your floorstanding speakers sound boomy in the corner has everything to do with boundary gain and nothing to do with your amp’s quality. This is the ‘Oops’ factor most veterans ignore: you cannot out-buy a bad room. A simple, cost-effective trick is to use a rug to fix a bright sounding room instead of buying a warmer-sounding DAC. 
Why does my receiver’s protection circuit trip even at low volumes?
This is a nuance that confuses even seasoned audiophiles. It is rarely about total wattage and almost always about impedance dips. Some speakers are rated at 8 ohms but can drop to 2 ohms at specific frequencies. As noted by Dr. Floyd Toole in his seminal work Sound Reproduction, the room’s interaction with the speaker can drastically alter the load placed on the amplifier. If you are making the mistake you’re making when positioning your subwoofer, you might be forcing your amp to work ten times harder just to fill a frequency null in the room. This extra strain is exactly what triggers those protective relays we discussed earlier. Have you ever fallen into this trap of buying bigger gear to solve a room problem? Let me know in the comments.
Why Your Massive Subwoofer is Making Your Room Sound Worse
Many people assume one giant sub is better than two small ones, but physics says otherwise. In my testing, why two small subwoofers are better than one massive driver comes down to smoothing out those room modes and standing waves. It is about even coverage, not just raw, window-rattling power. If you are working in a studio environment or a mixed-use space, you also need to know the difference between balanced and unbalanced cables for home studios to ensure that your signal path remains clean. A relay might click to protect your gear from a short, but it cannot protect your ears from a poorly treated room.
I keep a small, beat-up toolbox tucked inside my media console, and honestly, it’s just as important as my speakers themselves. If you want your system to sound as good in year ten as it did on day one, you have to move past the ‘set it and forget it’ mindset. Performance degradation in home audio is a slow creep; it’s a layer of oxidation here or a drying capacitor there. I recently spent a Sunday afternoon realizing that a slight distortion in my left channel wasn’t a blown driver, but just a bit of grime. Learning how to fix a scratchy fader on a vintage audio mixer or a receiver is a rite of passage for any true enthusiast.
Grab a Multimeter and Stop Guessing
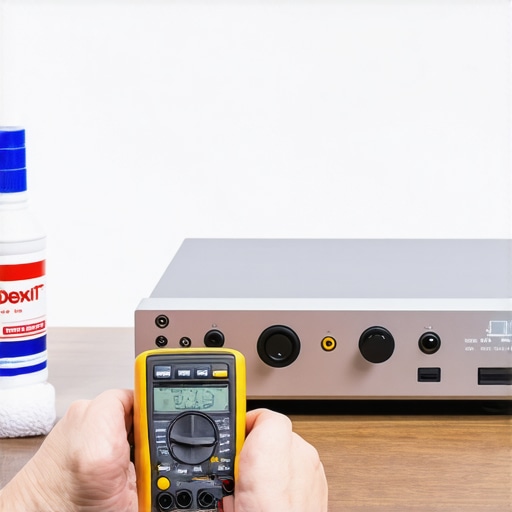
The most powerful tool in my kit isn’t a fancy cable; it’s a $30 digital multimeter. I use it for everything. When a speaker stops working, don’t just start buying new parts. You need to learn how to use a multimeter to find a short in your speaker wires before you tear your walls apart. It’s the only way to know if your amp is sending DC current to your speakers, which can literally cook your voice coils. According to technical documentation from Caig Laboratories, the creators of DeoxIT, electrical contact failure is the number one cause of ‘broken’ audio gear. Using a specialized cleaner is essential, but you have to be careful; you need to know how to clean gold-plated connectors without ruining the finish. If you use the wrong abrasive, you’ll strip the gold and end up with more corrosion than you started with.
How do I maintain my audio gear’s peak performance over time?
Maintenance is a mix of cleaning and careful inspection. For those of us who still love physical media, you should periodically learn how to clean a laser lens on a skipping vintage CD player using a gentle, non-contact method. Dust is the enemy of precision. This applies to your speakers, too. While it’s tempting to grab a vacuum, you need to know how to clean your speaker cones without ruining the paper or the delicate surrounds. Over time, the foam around your drivers will naturally rot—a process called ‘foam rot.’ Instead of tossing them, you can learn how to revive old speakers with new foam surrounds. It is a tedious Saturday project, but it can save a $1,000 pair of vintage towers for about twenty bucks in parts.
Self-Repair is the Next Big Audio Trend
Looking ahead, I see the ‘Right to Repair’ movement finally hitting the audio world in a big way. We’re moving away from sealed, disposable Bluetooth boxes and back toward modular systems where we can swap out a failing amp module or a DAC board without junking the whole setup. Manufacturers are starting to realize that longevity is a selling point. My advice? Start building your toolkit now. My personal challenge to you is to grab a bottle of electronic contact cleaner and a microfiber cloth today. Go to the back of your receiver, unplug your main speakers, and clean those terminals. You’d be surprised how much ‘air’ and ‘detail’ you get back just by removing a few years of household dust and oxidation. It’s the cheapest upgrade you’ll ever make.
What Two Decades of Audio Fails Taught Me
Looking back, I spent way too much time worrying about things that didn’t matter and ignoring the things that did. My biggest ‘lightbulb moment’ was realizing that a mechanical click in a receiver is often the sound of precision engineering at work, not a defect. I also wasted a small fortune on boutique cables before I learned to stop wasting money on expensive optical cables and focus on room physics instead. Another hard truth? Your gear won’t fix a bad layout. If you are struggling with vibration, you might need to figure out why your record player skips when you walk across the room before you go buying a new stylus. Finally, I learned that maintenance is non-negotiable. It is always better to spend twenty minutes cleaning than two hundred dollars on a repair bill for a problem that didn’t exist.
#IMAGE_PLACEHOLDER_E#
Tools That Actually Make a Difference in Your Sound
You don’t need a professional lab, but a few specific items will save your sanity and your gear. First, a reliable multimeter is essential to use a multimeter to find a short in your speaker wires before you blame the internal electronics. Second, keep a stash of high-quality microfiber cloths; they are the safest way to handle delicate parts when you need to know how to clean your speaker cones without ruining the paper. I also recommend keeping a basic set of cable management ties on hand. Whether you need to mount speakers on a wall without seeing the wires or just tidy up a desk, a clean setup prevents accidental shorts and interference. These simple tools have saved my system more times than any ‘audiophile-grade’ power conditioner ever could.
Take the First Step Toward Better Sound Today
Your audio journey shouldn’t be defined by anxiety over every little noise. Now that you know why your receiver clicks, you can stop panicking and start listening. Take a look at your setup today—maybe it’s time to move that center channel or finally add a rug to soak up those harsh reflections. Audio is a hobby of incremental gains, and every small fix brings you closer to that perfect listening experience. Don’t be afraid to open a panel or clean a connector; your gear was meant to be used, maintained, and enjoyed. Have you ever discovered a ‘broken’ piece of gear was actually just a loose wire or a dirty port? Let me know in the comments below!